
- name: Cone Nebula and the Christmas Tree Cluster
- coordinates: RA: 06hr 40' 52"; DEC: 09º 52' 37"
- distance from our solar system: approx. 2400 light-years
- magnitude: 4.1
- apparent size: 8.6' x 8.6' (however, all the cosmic structures that can be photographed extend beyond this)
About the Cone Nebula (NGC 2264)
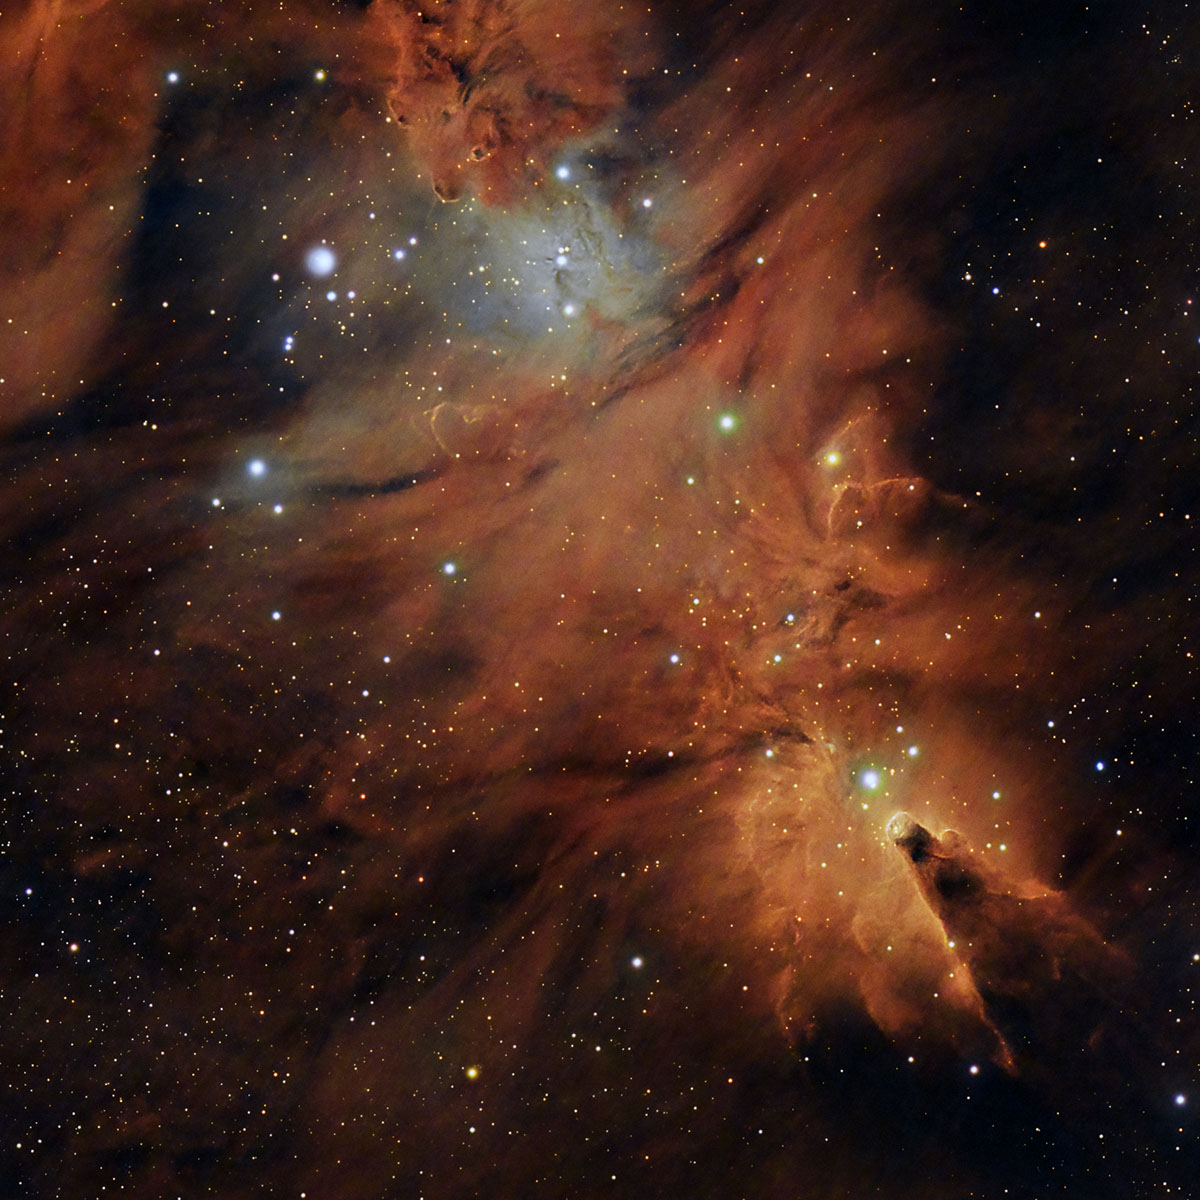
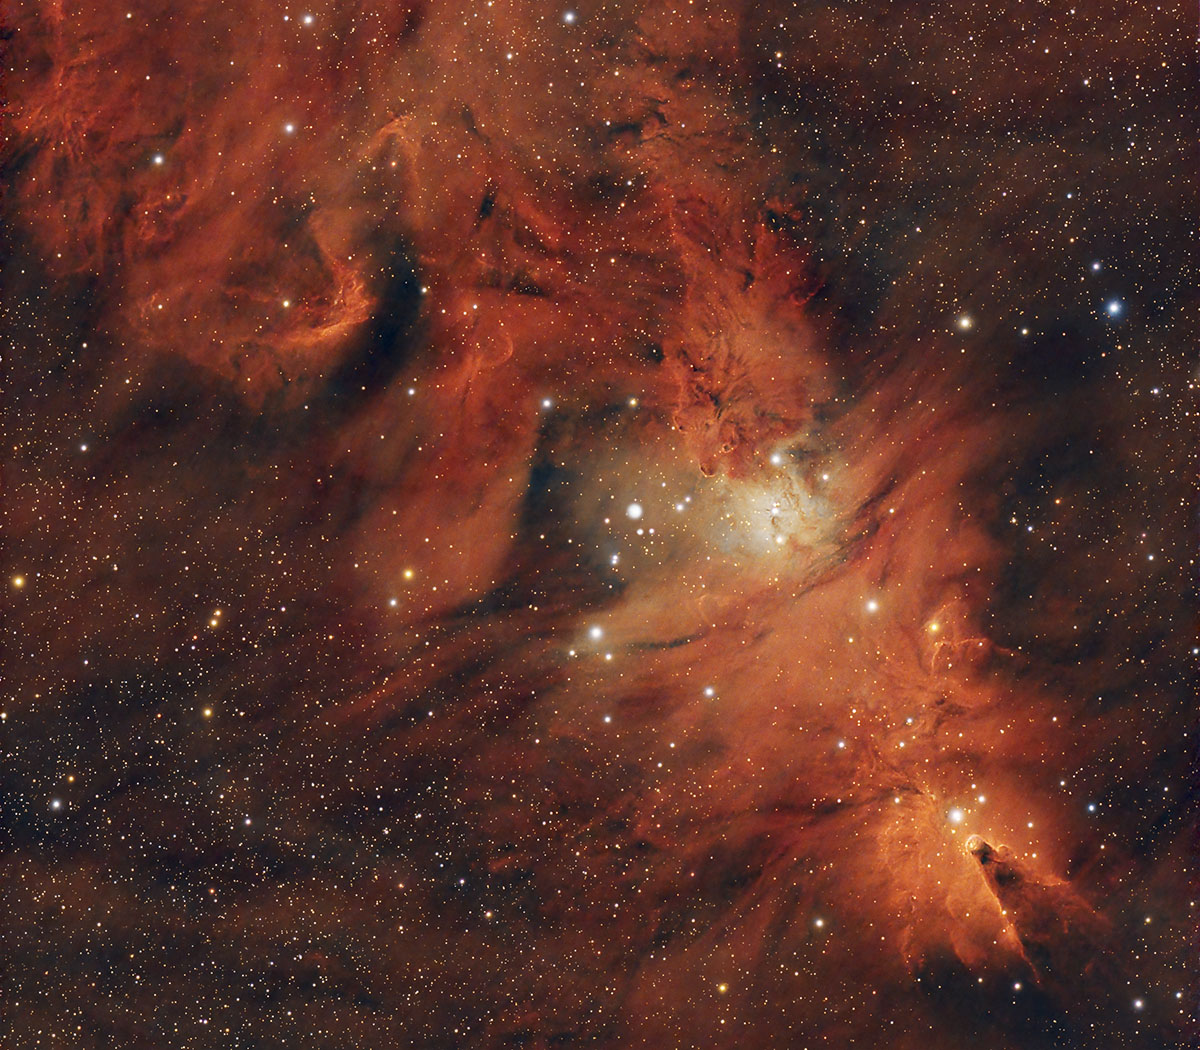
The Cone Nebula, discovered by William Herschel in 1785, is a star-forming region located in the Monoceros (Unicorn) constellation, at a distance of approximately 2400–2500 light-years from Earth. It is part of the NGC 2264 complex, which includes both emission nebulae and an open cluster of young stars. Its characteristic shape, resembling a dark cone, is created by a dense cloud of gas and interstellar dust silhouetted against the bright background of an ionized hydrogen nebula.
The structure of the Cone Nebula is dominated by intense star formation processes, being illuminated and sculpted by ultraviolet radiation from nearby massive, young stars, especially the star S Monocerotis. This radiation ionizes the surrounding gas and produces bright hydrogen-alpha regions, while denser areas remain opaque and form the dark silhouette of the cone. This cone, located in the lower part of the posted images, has a length of approximately 7 light-years.
The apparent size of 8.6' x 8.6' allows for multiple framings. You can create wide-field compositions where the entire "cosmic tree" becomes visible, or focus on detailed regions such as the center of the tree or only the Cone Nebula itself. Extra-wide frames can also be captured, including both the Cone Nebula and the Rosette Nebula (NGC 2244), which lies below the Christmas Tree Cluster.
I opted for a more "classic" framing to highlight the tree and the cone, and less the surrounding area. As can be seen, my tree appears inverted.
How to find the Cone Nebula and the Christmas Tree Cluster in the sky
The position of the Cone Nebula is relatively easy to identify in the sky if you know how to find the Orion constellation. If you extend the line connecting the stars Betelgeuse and Bellatrix to the left (!), by a segment approximately equal to the distance between them, you can find the approximate position of the nebula.
Betelgeuse and Bellatrix are the brightest stars located above Orion’s Belt (the line of the three stars in the middle of the constellation).
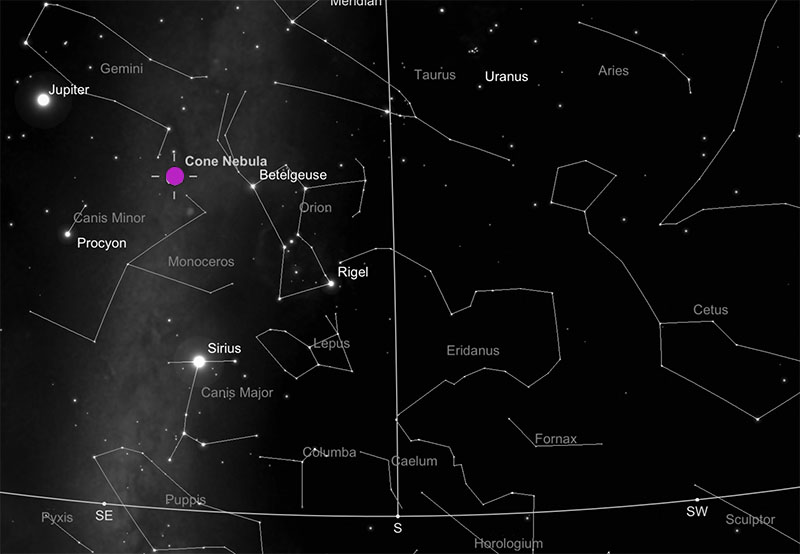
Image gallery - Cone Nebula (NGC 2264)
A 9h 54 min imaging session on November 1, 2024, in Orlești-Vâlcea (Bortle 4–5). EQ6-R Pro mount, SW Esprit 100ED telescope (550mm, f/5.5), Optolong L-eXtreme narrowband filter (7 nm, Ha & OIII), guiding and data acquisition via ASIAIR+, 2 astro batteries, 2 dew heaters.
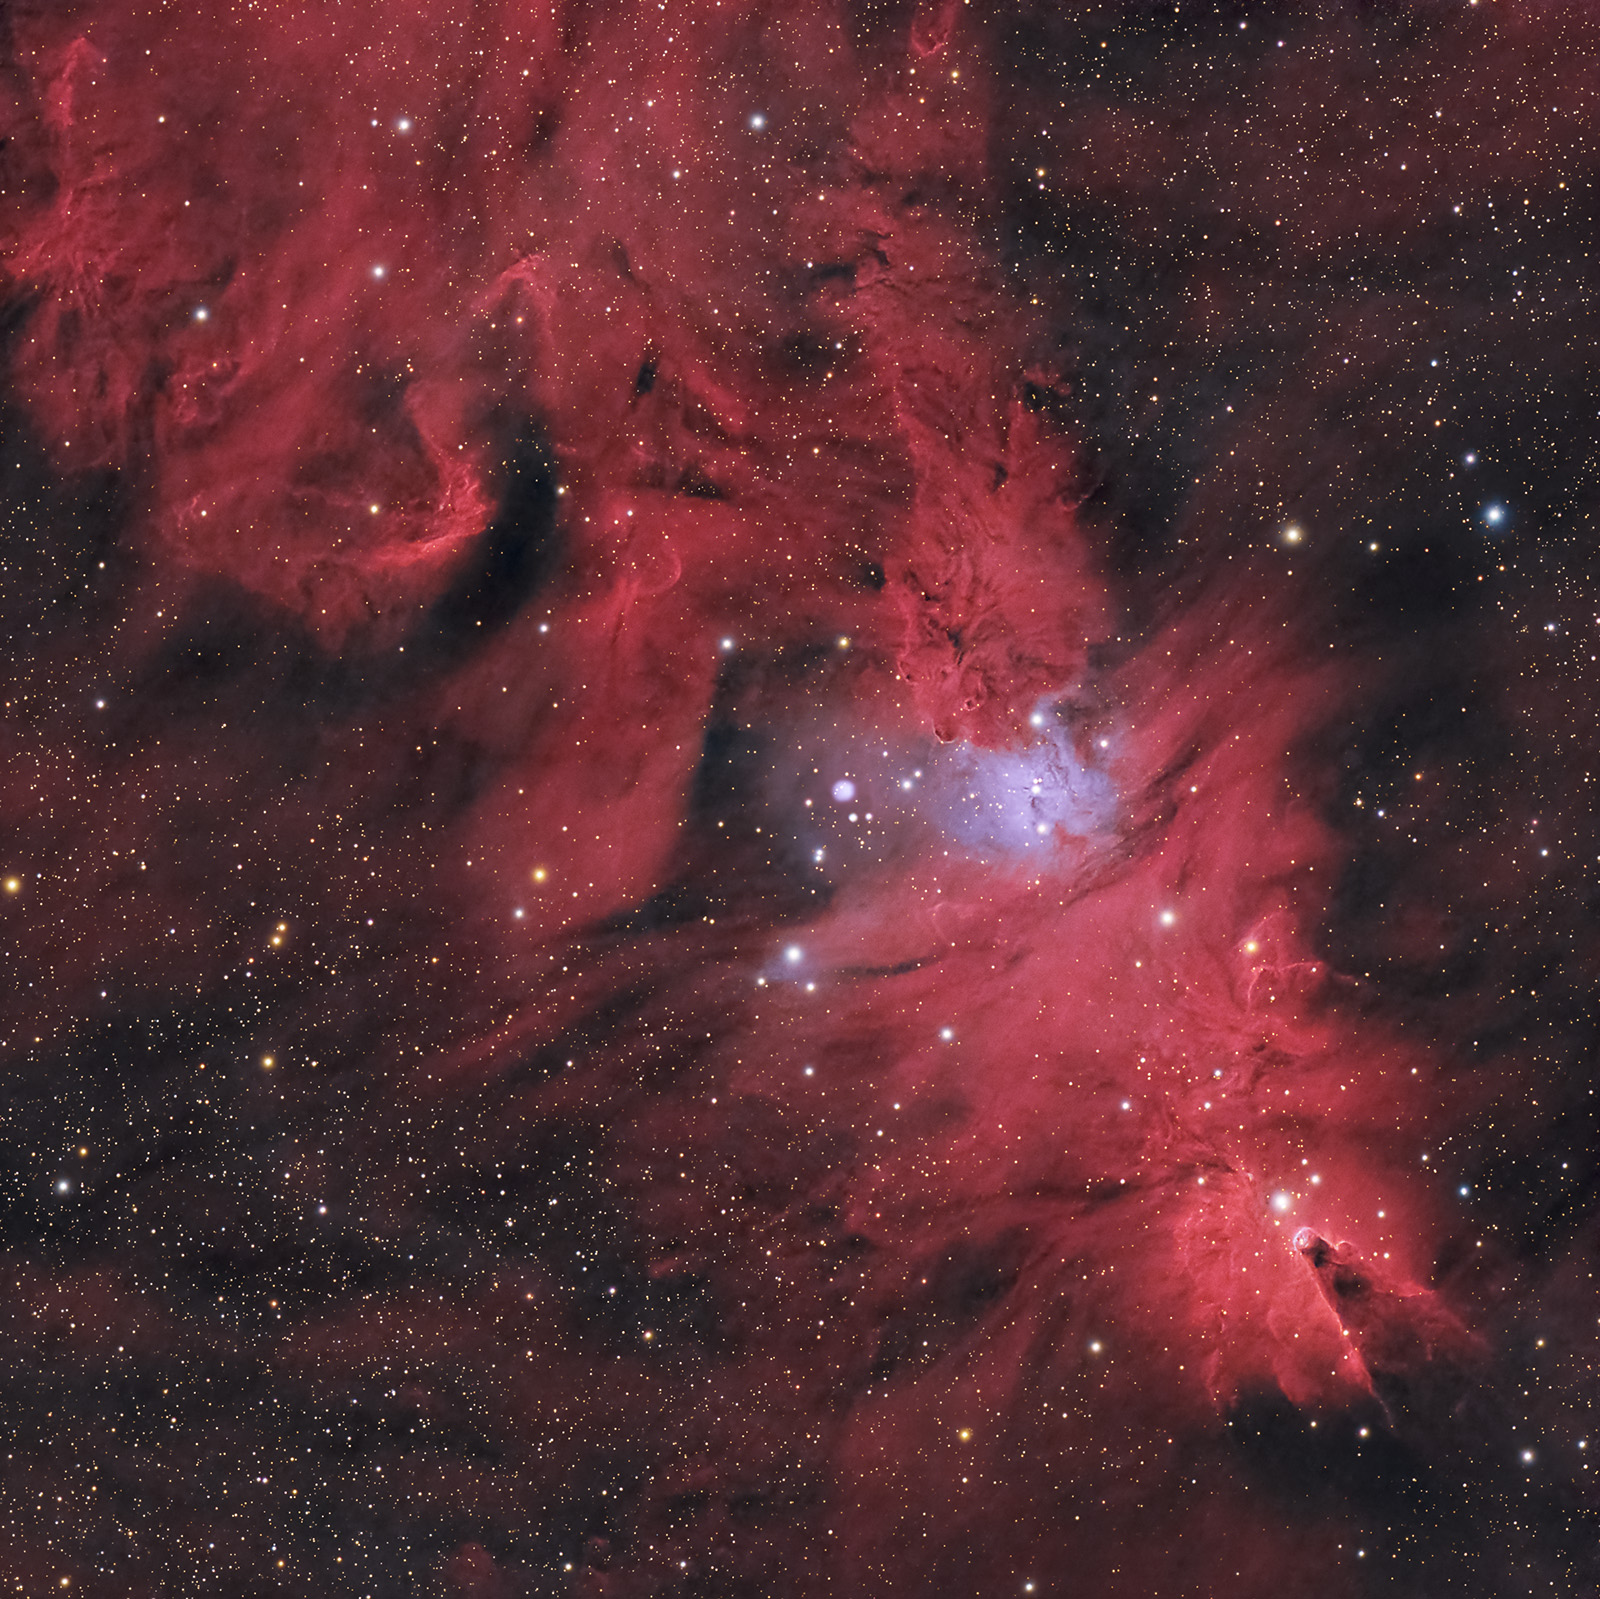
Color version 2:

Useful tips for photographing and processing images of the Cone Nebula and the Christmas Tree Cluster
The Cone Nebula is extremely rich in hydrogen-alpha. For this reason, dual narrowband filters (Optolong L-Extreme, L-Ultimate, L-Para, etc.) and OSC (color) cameras can be used. Over the resulting frame, dedicated to the nebula structure, another frame captured exclusively with UV/IR filters can be added to achieve natural star colors.
Of course, it can also be photographed with mono cameras and hydrogen, sulfur, and oxygen filters. However, this approach is more difficult and involves a more complex setup.
The optimal imaging period is November–February.
I photographed the nebula on November 1, 2024, from the Vâlcea area (Bortle 4–5), accumulating about 10 hours of integration time from my backyard, using the following equipment:
- SW EQ6-R Pro mount
- ASI 533 MC camera (gain 101, cooled to -5°C)
- 7 nm narrowband filter (Ha & OIII), Optolong L-eXtreme
- Esprit 100ED telescope with field flattener (550 mm, f/5.5). Focus achieved using a Bahtinov mask.
- 2 dew heater straps
- 2 astro batteries
- Guiding and data acquisition via ASIAIR+
- ASIAIR app running on a tablet. The same tablet was used as a light panel for capturing flat frames.
- 3-minute exposures, plus calibration frames: Flats, Darks, and Bias.
PROCESSING
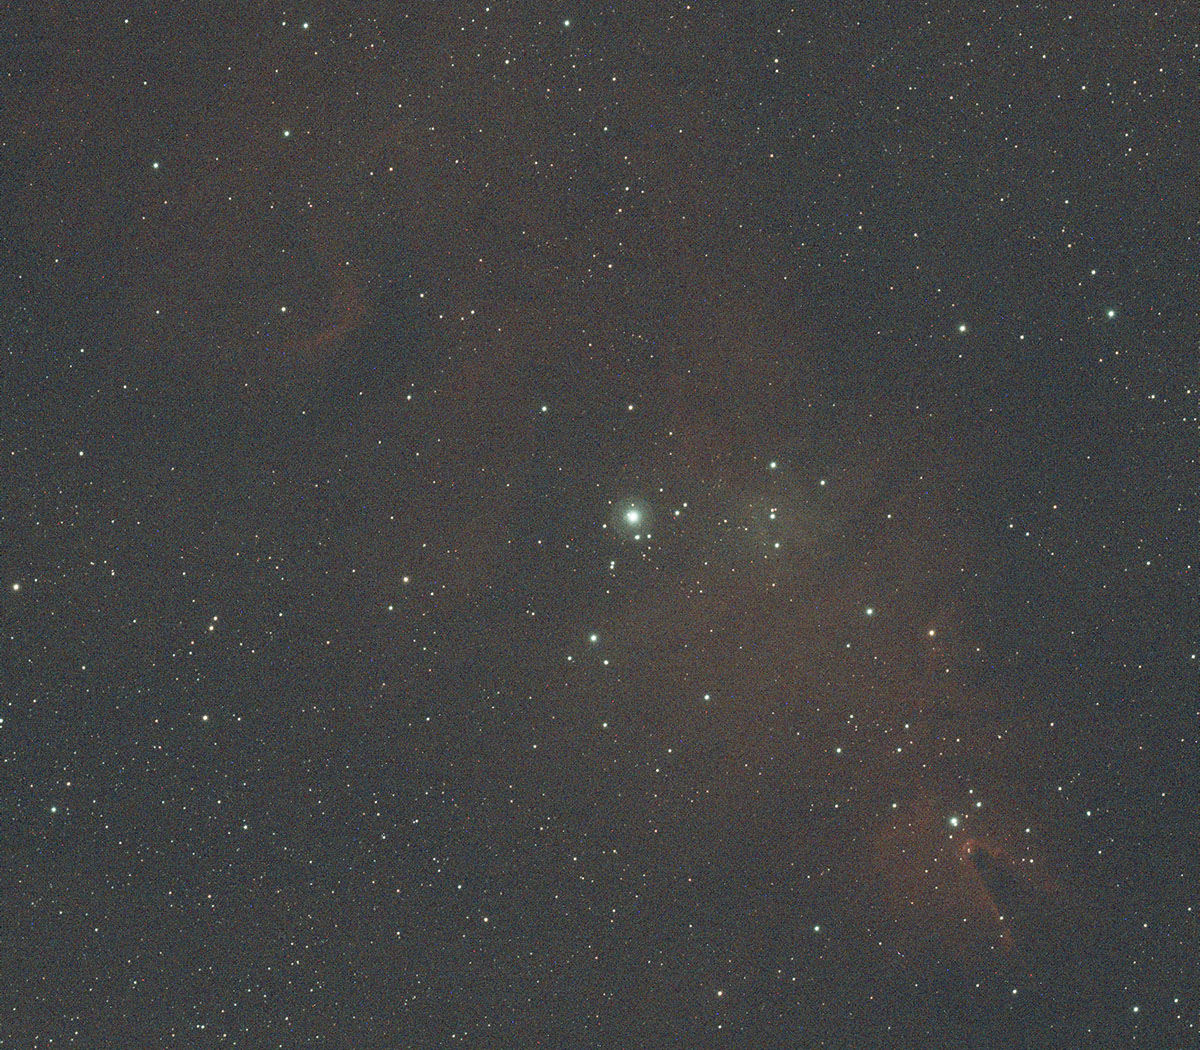
Single 3-minute frame (.fit; debayered, without other calibrations) vs. final processed frame
General steps in PixInsight are the following:
- check all light frames using Blink and delete the ones with errors
- create the master file by stacking all light frames and calibration frames (flat, dark and bias) in WBPP
- apply BlurXTerminator and Noise Reduction to the final master frame
- correct colors using SpectrophotometricColorCalibration, and reduce the green tint using SCNR
- optionally extract the background and correct the gradient if necessary: DynamicBackgroundExtraction / AutomaticBackgroundExtraction + GradientCorrection
- extract the stars using StarNet2; this results in a starless image and a stars-only image; both images are converted to 16-bit TIFF (i.e., transformed from linear to non-linear versions; from this point on, only non-linear versions are used)
- work only on the starless image: apply various transformations in CurvesTransformation (contrast, saturation)
- finally, combine in PixelMath the modified starless image with the stars-only image: combine (Starless, Stars, op_screen())
- The final processing of the Cone Nebula image is relatively simple and does not involve complicated procedures.