
- name: Cat's Eye Nebula (NGC 6543)
- coordinates: RA: 17h 58m 33s; Dec: +66° 37′ 59″
- distance from our Solar System: approximately 3,300 light-years
- magnitude: 11.1
- apparent size: 37″ × 32″
About the Cat's Eye Nebula
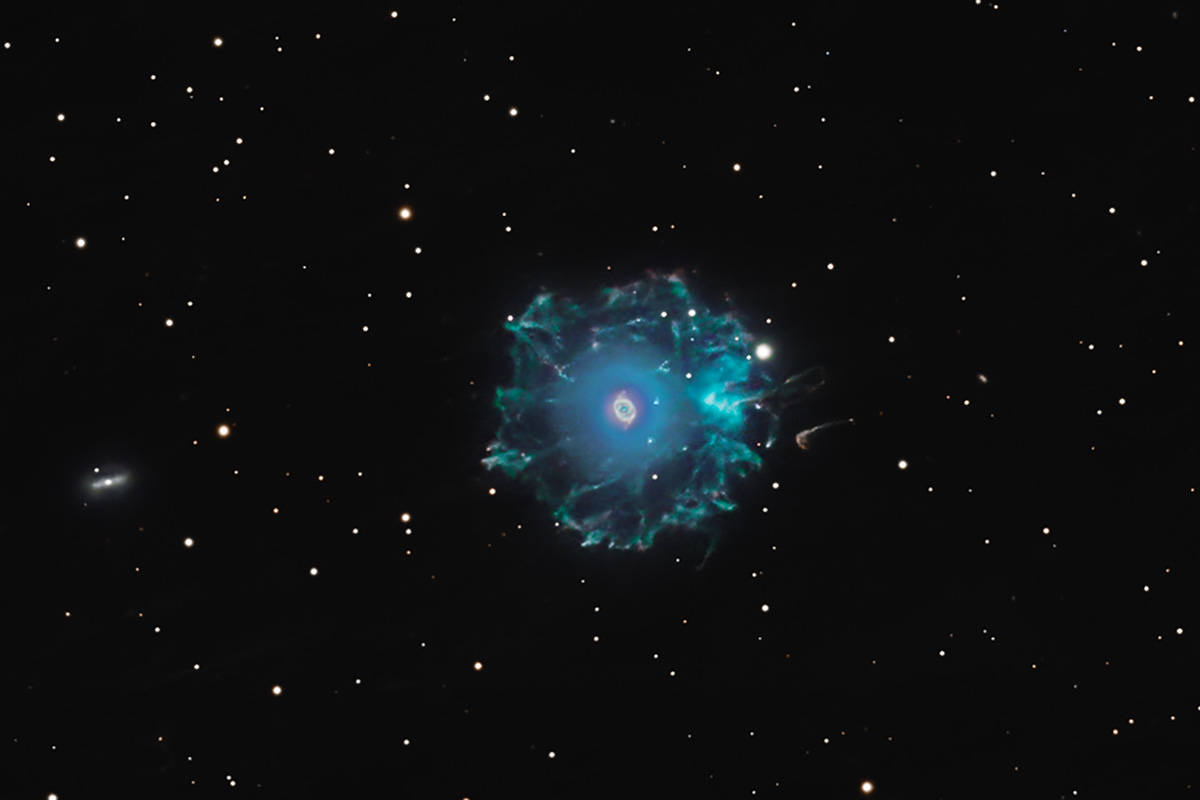
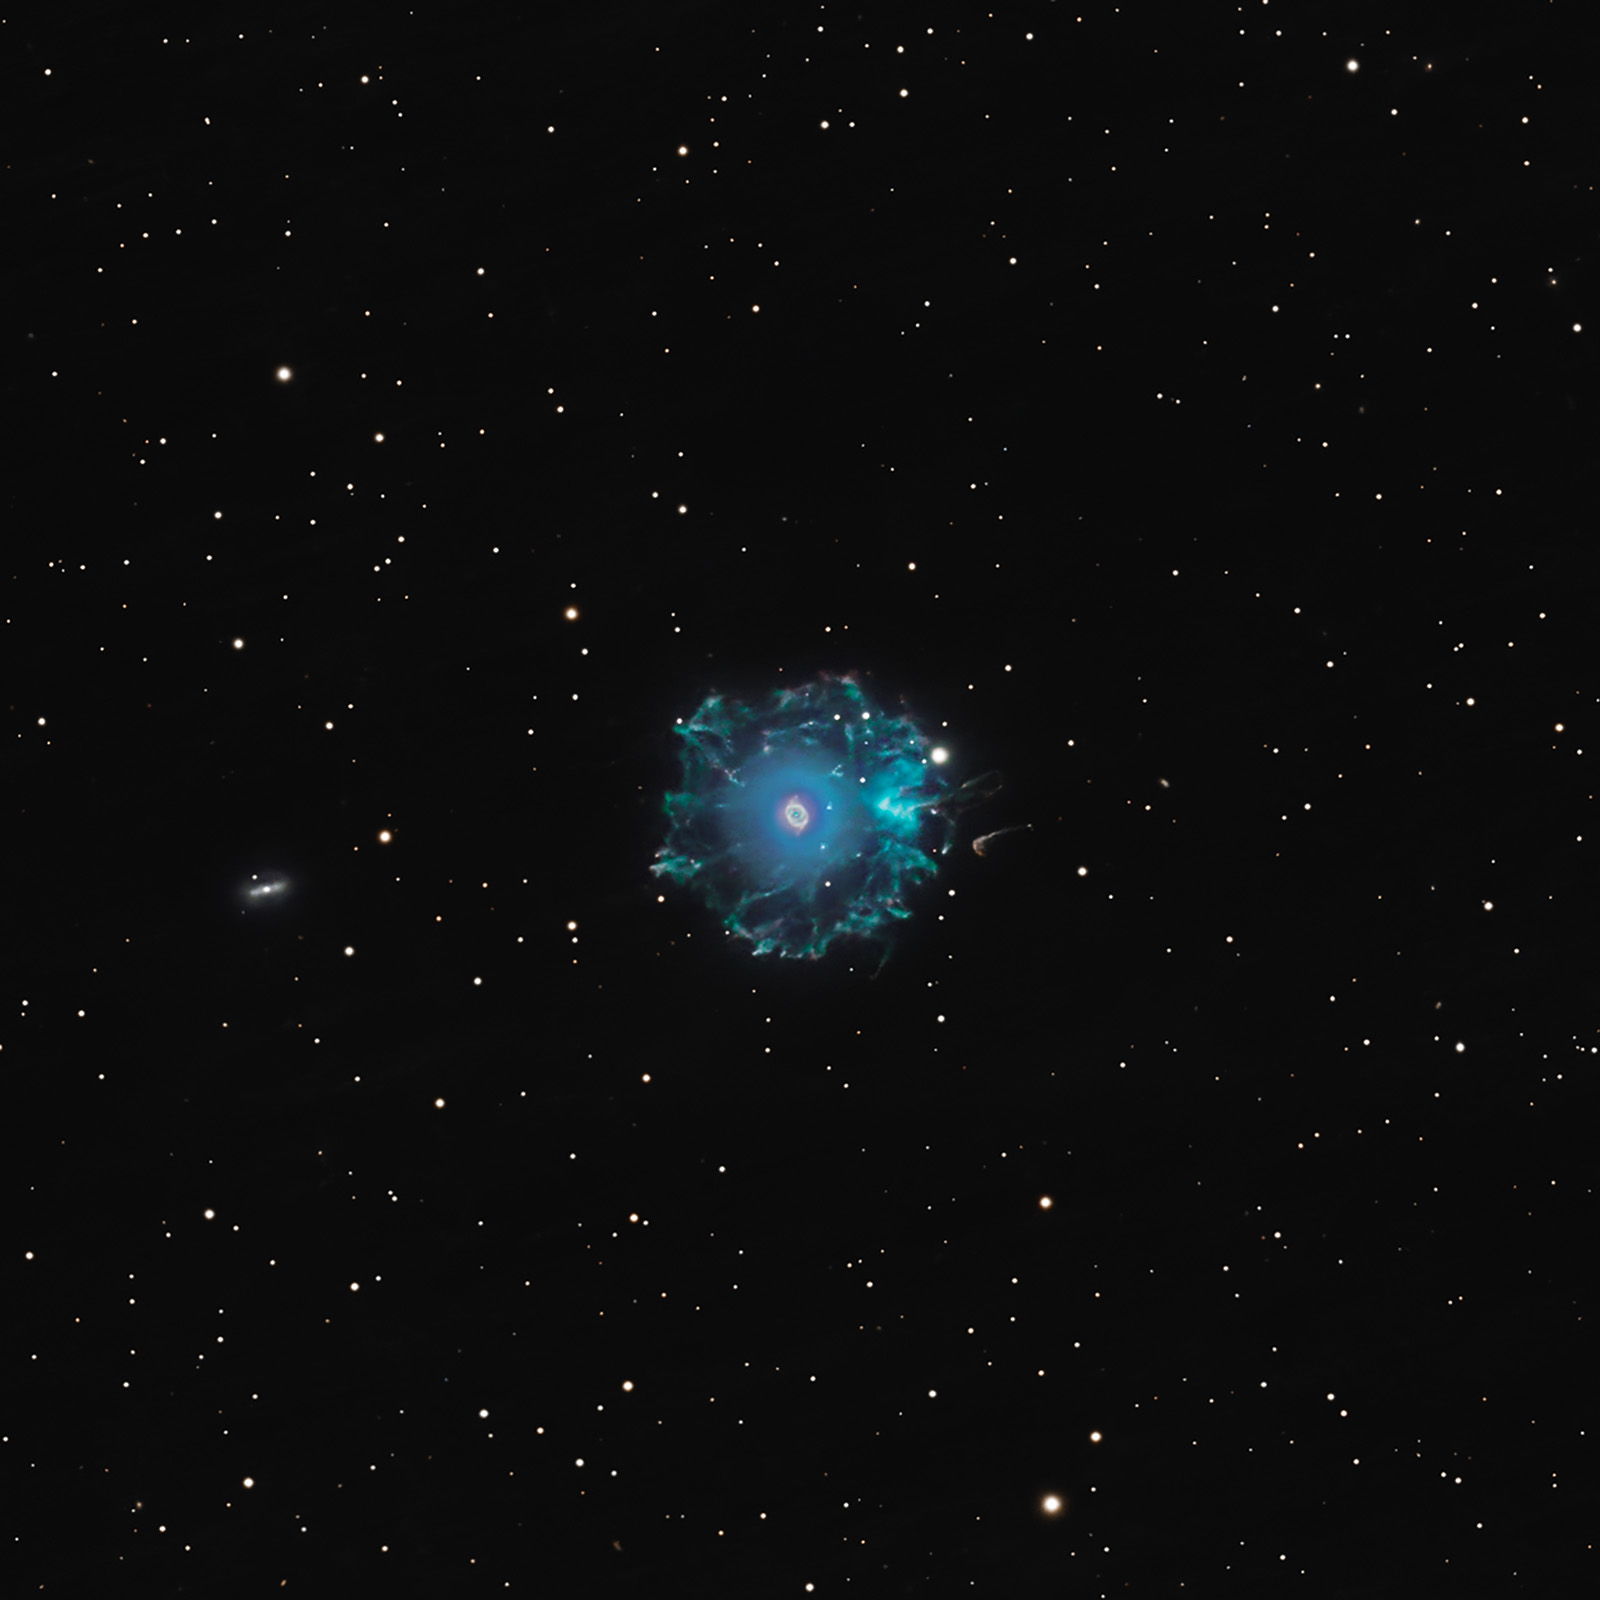
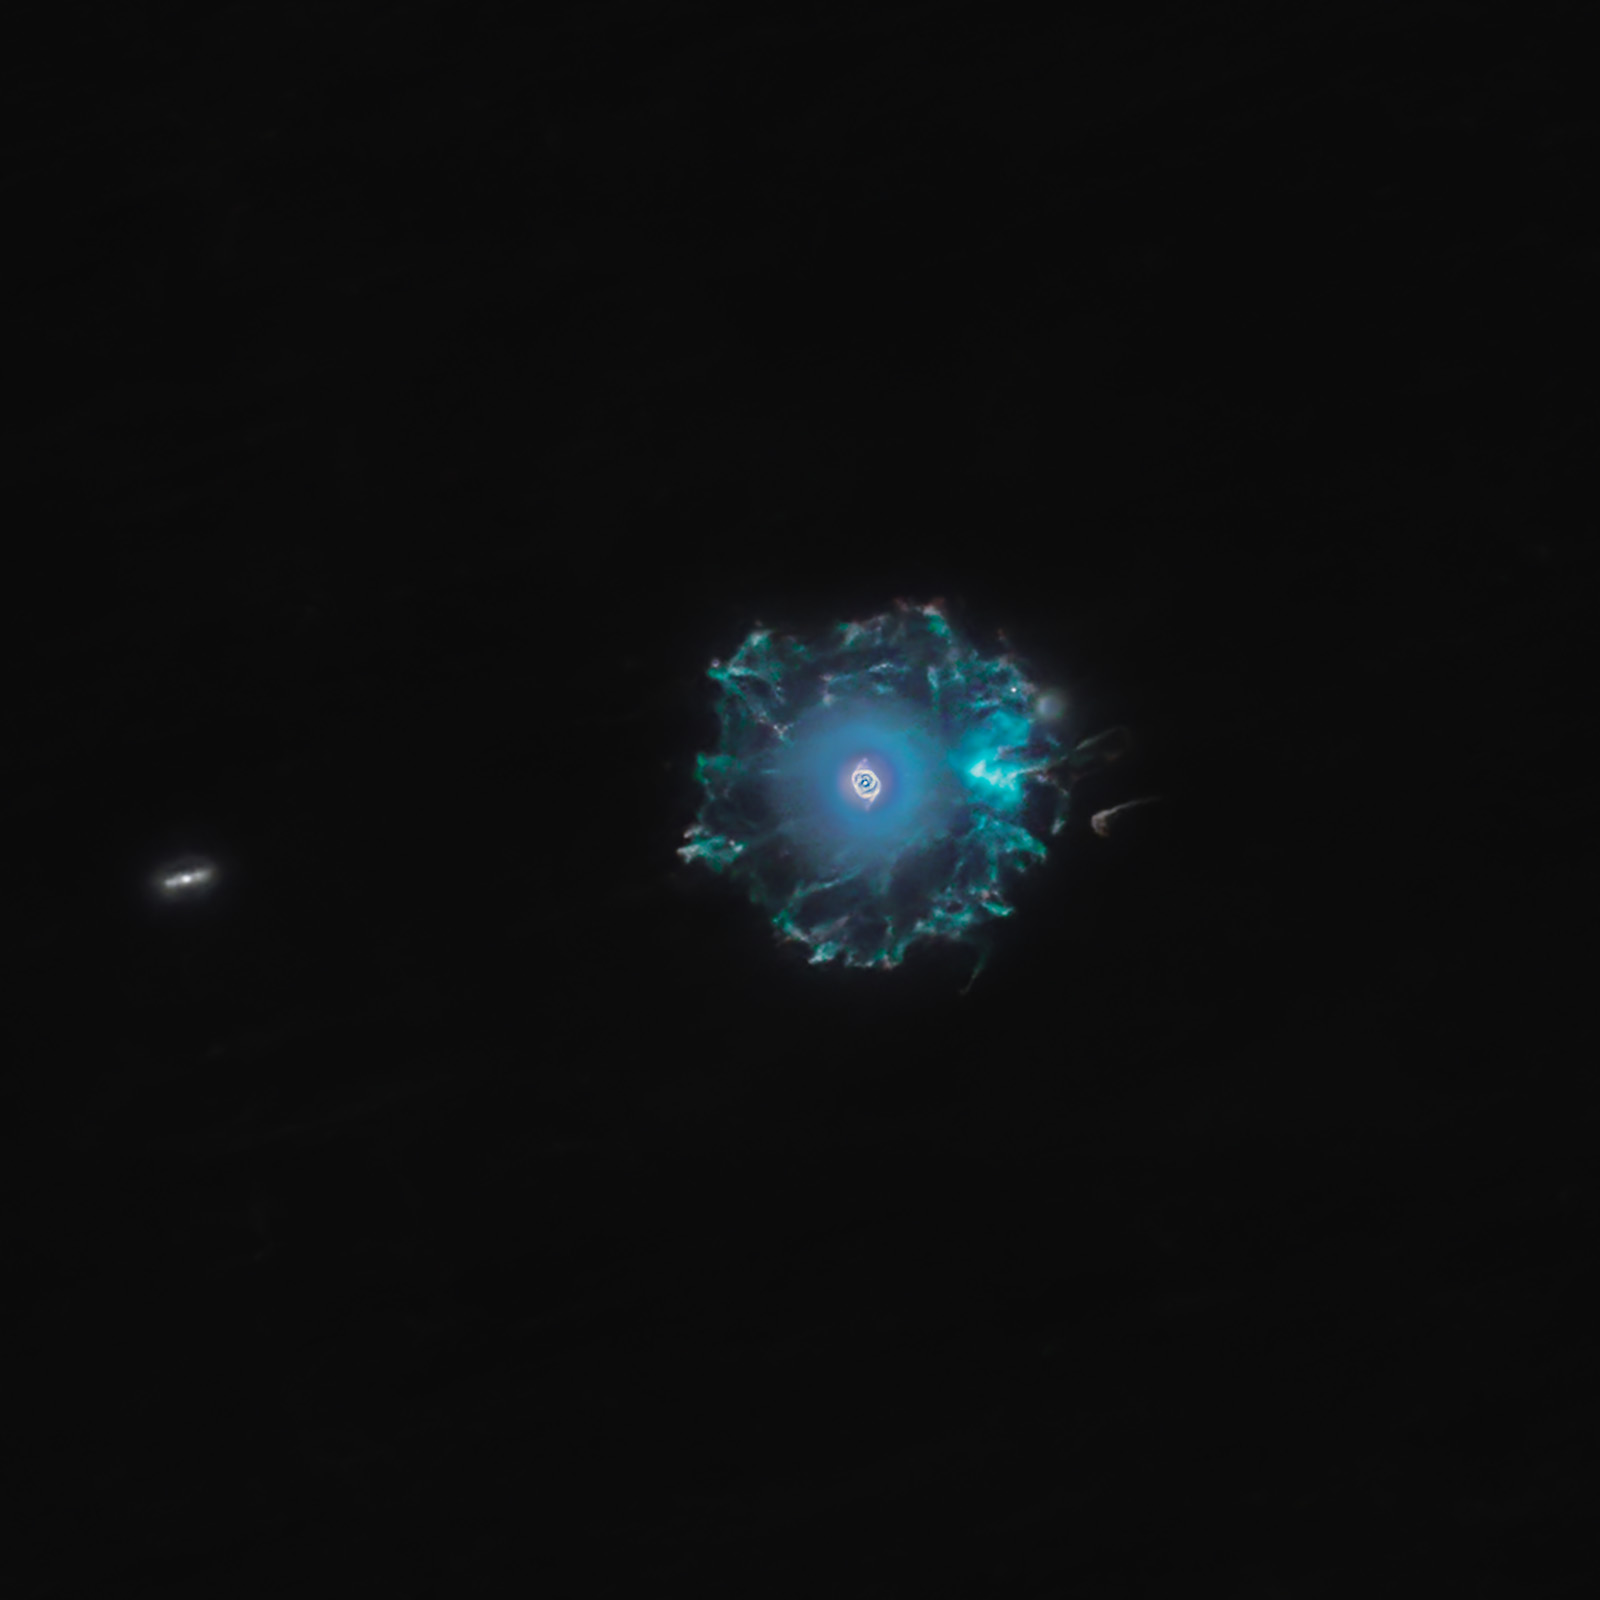
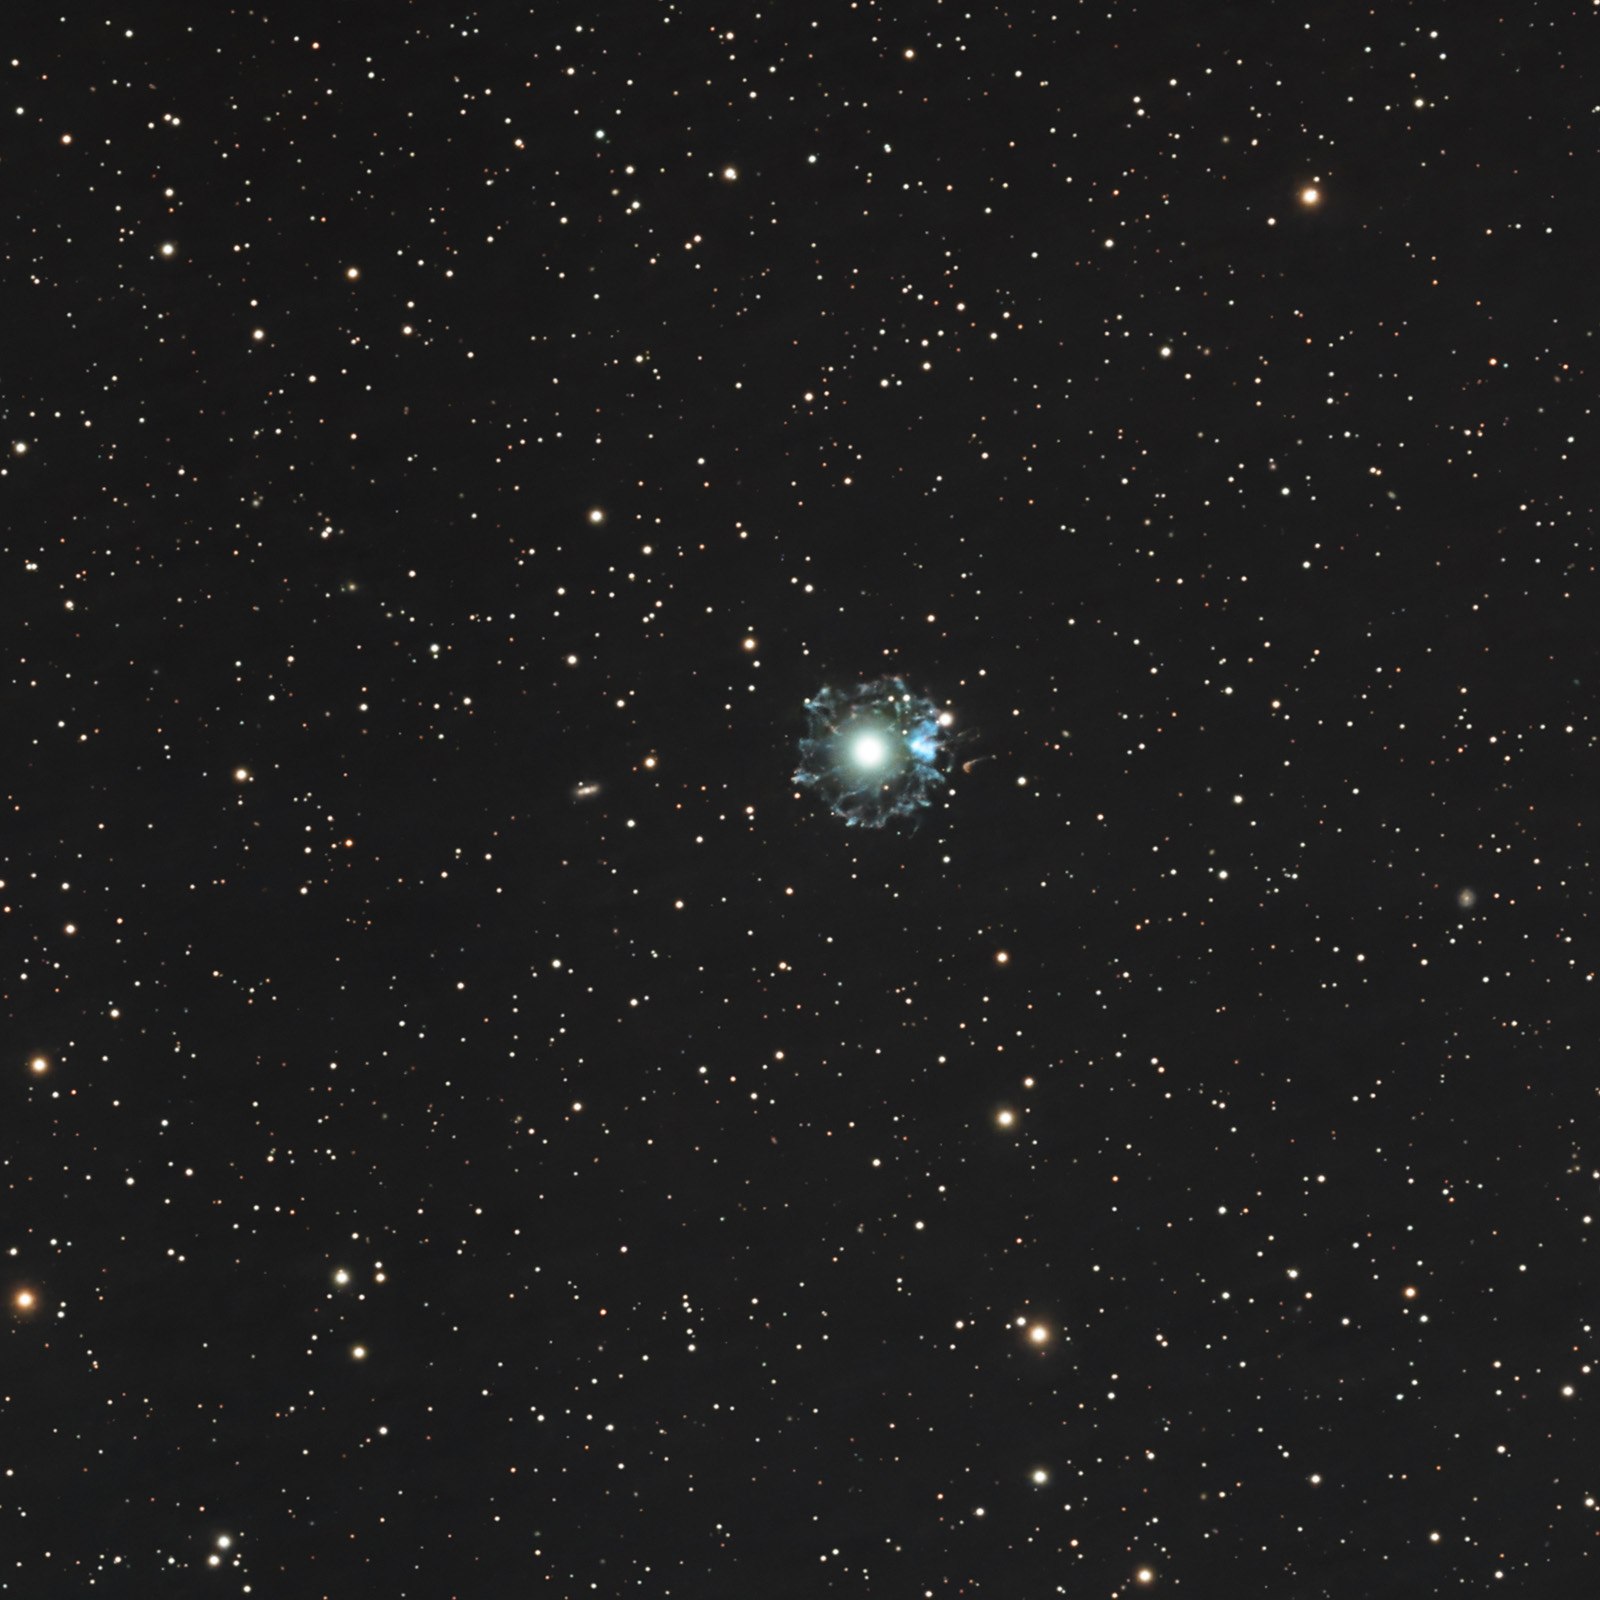
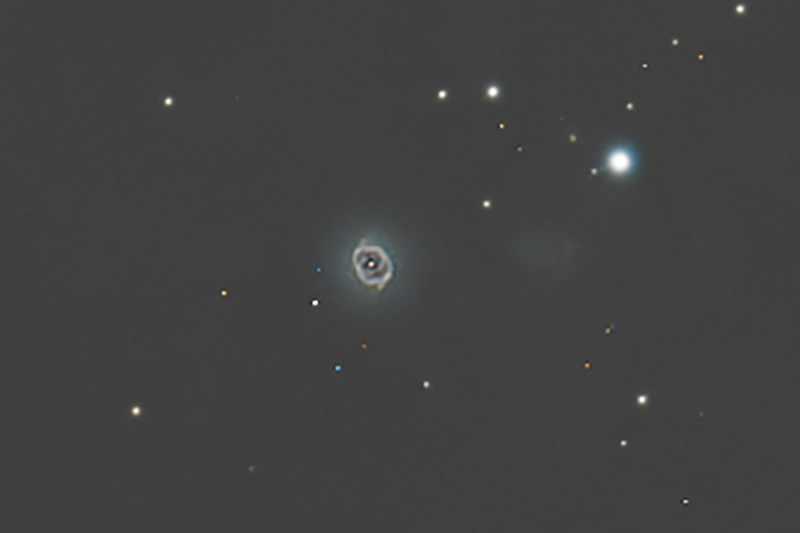
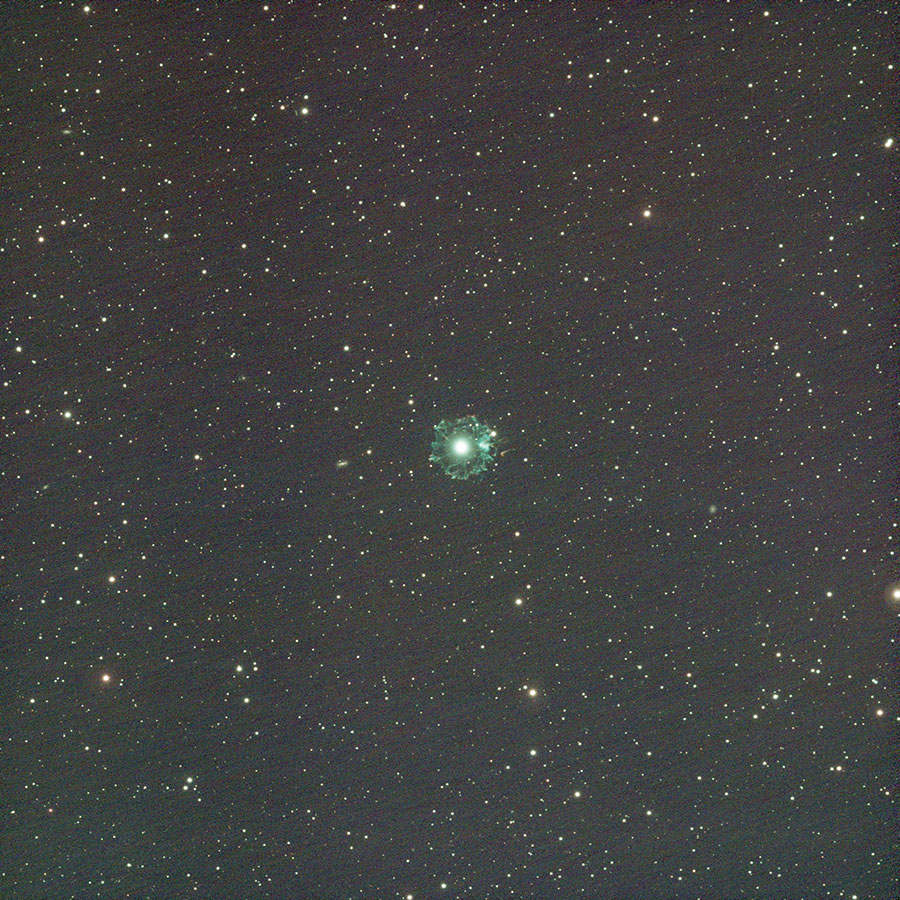
One of the most beautiful planetary nebulae, featuring an extraordinarily complex structure, is the Cat's Eye Nebula. It is located approximately 3,300 light-years away in the constellation Draco. An interesting coincidence is that it lies very close to the North Ecliptic Pole.
Discovered in 1786 by William Herschel, the nebula is renowned for its remarkably intricate appearance. In images captured by NASA and ESA, the central region appears as a system of concentric shells, filaments, and gas bubbles intertwined in an almost symmetrical pattern. These structures are the result of multiple episodes of mass ejection from the central star.
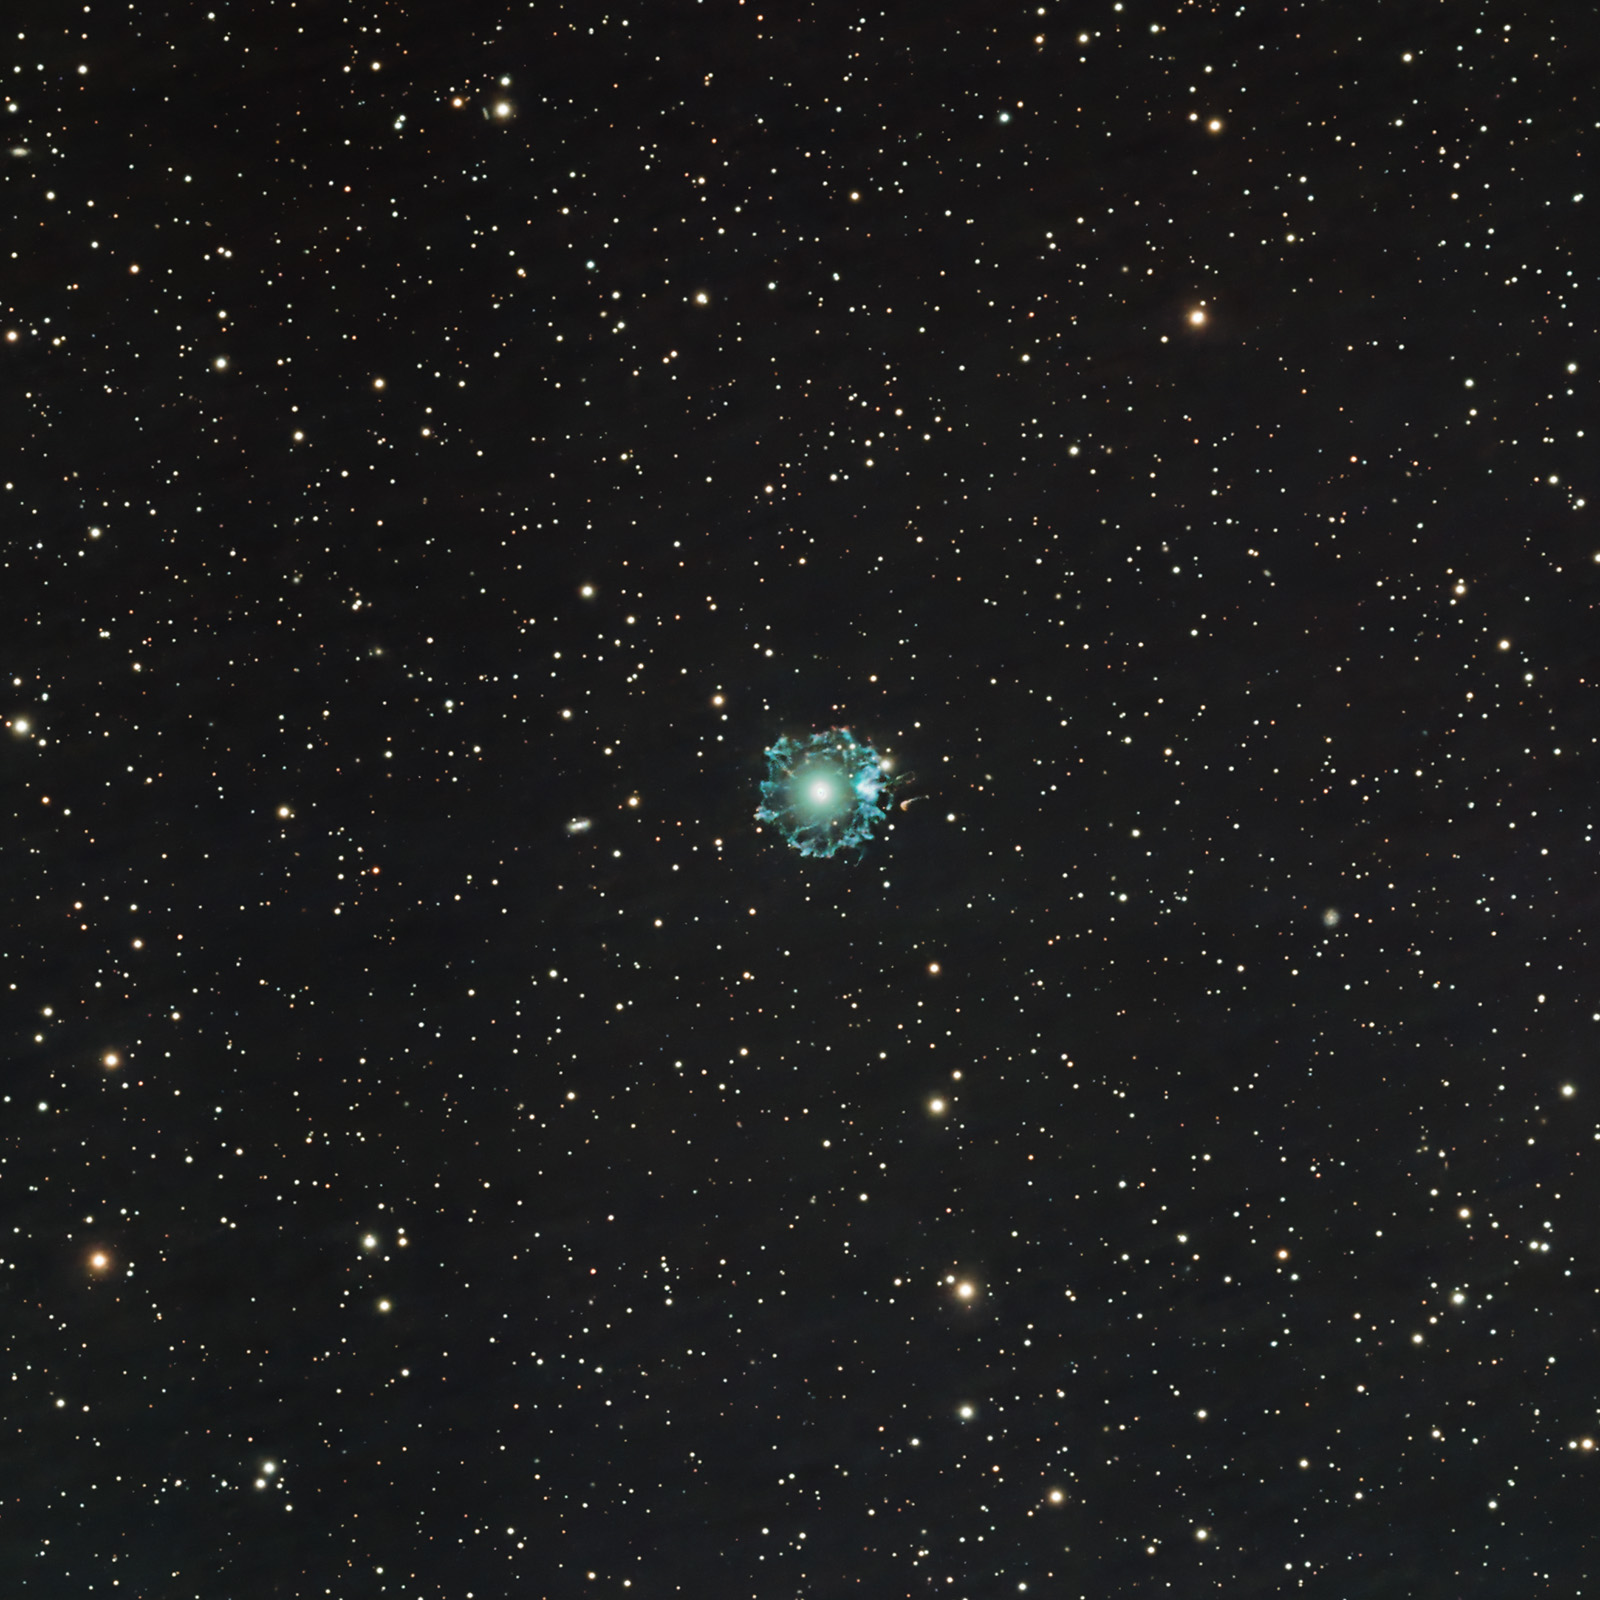
One of the most fascinating features of the Cat's Eye Nebula is its extensive outer halo, composed of material expelled long before the formation of the bright inner structure visible today. This halo is much fainter than the central nebula and can only be photographed through very long exposures. The enormous difference in brightness between the core and the outer shells makes NGC 6543 a challenging astrophotography target, often requiring HDR techniques to reveal both the intricate details of the nucleus and the faint surrounding halo.
The nebula is estimated to be about 1,000 years old. The bright inner nebula has a diameter of approximately 0.3 light-years, while the bluish-green outer halo spans roughly 5–6 light-years.
The best time to photograph the Cat's Eye Nebula is from May through July, making it both a spring and a summer target.
I photographed the nebula on April 24 and 25, 2025, collecting a total of 10 hours of exposure time from Orlești, Romania (Bortle 4 skies). The equipment used was an EQ6-R mount, a cooled ASI 533MC Pro camera operating at -5°C and gain 101, a Sky-Watcher Esprit 100ED refractor with field corrector at 550 mm f/5.5, and an Optolong L-eXtreme filter.
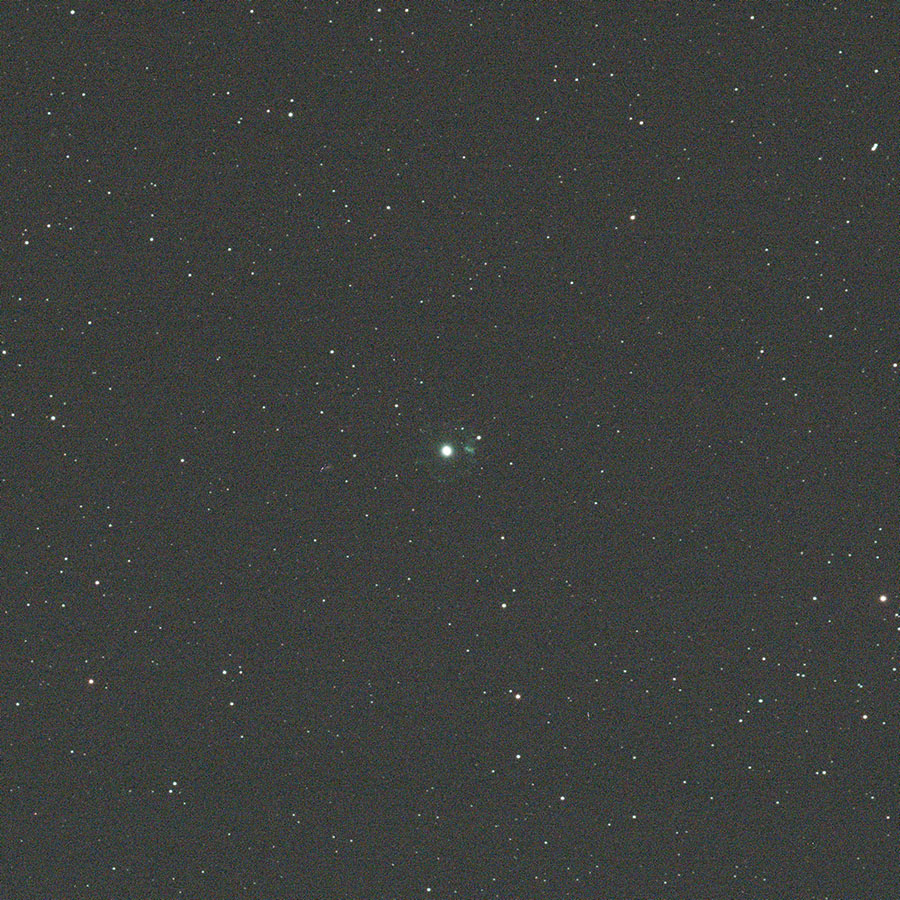
In addition, in May 2026 I captured 100 exposures of 3 seconds each to reveal finer details within the nebula's central region.
How to Find the Cat's Eye Nebula in the Night Sky
As shown in the image below, NGC 6543 is located near the center of the constellation Draco, as if the Dragon were coiling around and protecting this remarkable object positioned almost directly on top of the North Ecliptic Pole (NEP).
Image Gallery – The Cat's Eye Nebula (NGC 6543)

Useful Tips for Photographing and Processing Images of the Cat's Eye Nebula
It is also useful to capture very short exposures (less than 5 seconds) in order to reveal the intricate structure of the nebula's central region using Lucky Imaging techniques, similar to those employed in planetary astrophotography. During the final processing stage, the image containing the overall structure of the nebula can be combined with the image obtained from the short exposures of the central region.
Naturally, a Go-To mount or a Star Tracker is required. Since telescopes with long focal lengths are generally heavy, the mount must be capable of delivering accurate tracking performance.
For this project, I used an EQ6-R mount, an ASI533MC camera, a Sky-Watcher Esprit 100ED refractor (550 mm, f/5.5) for the outer structure, and a TS-Optics APO 130 refractor (910 mm, f/7) for the central region, together with an Optolong L-eXtreme filter (to capture the nebula's bluish outer shell) and a Baader UV/IR Cut filter (to reveal the fine details of the core). In hindsight, I should have spent more time imaging the central region with the 910 mm telescope.
Single 3-minute exposure (.fit file, debayered, without any additional calibration) versus the final unprocessed master frame. Notice the pronounced diagonal noise pattern and gradient. The nebula's central region is also not visible.
The general workflow in PixInsight is as follows:
- Inspect all light frames using Blink and discard any frames affected by errors.
- Create the master image by integrating all light frames together with the calibration frames (flats, darks, and bias frames) using WBPP.
- Calibrate the colors using SpectrophotometricColorCalibration.
- Apply BlurXTerminator and Noise Reduction to the final master frame.
- Extract the background and correct gradients if necessary using DynamicBackgroundExtraction / AutomaticBackgroundExtraction together with GradientCorrection.
- Create a circular mask for the nebula's central region using the GAME script in PixInsight, then remove the stars with StarNet2. This produces a starless image and a stars-only image. The mask prevents the bright core from being mistaken for a star and removed during star extraction. Both images are then converted to 16-bit TIFF format (transforming them from linear to non-linear data). From this point onward, only the non-linear versions are used.
- Work exclusively on the starless image. Apply the mask to the central region and perform an aggressive HDRMultiscaleTransform (Number of Layers = 4, Number of Iterations = 2). Then apply a second mask covering the entire nebula, invert the mask to select the background, and process the background by reducing saturation, reducing noise, increasing contrast, and slightly lowering brightness.
- Finally, recombine the modified starless image with the stars-only image using PixelMath:
combine(Starless, Stars, op_screen()).