

- name: Eastern Veil Nebula (NGC 6992), Western Veil Nebula (NGC 6960)
- location: Cygnus Constellation
- Eastern Veil. RA: 20hr 57' 19"; DEC: +31º 48' 07"
- Entire Veil Nebula. RA: 20hr 51' 20"; DEC: +30º 36' 00"
- distance from Earth: 2600 light-years
- magnitude: 5
- apparent size: 60 x 30 arcmin
- About the Veil Nebula
- Gallery – Western Veil Nebula
- Gallery – Eastern Veil Nebula
- Gallery – Entire Veil Nebula (Eastern region, Western region, Pickering’s Triangle). The Cygnus Loop
- How to locate the Veil Nebula in the sky
- Useful tips for photographing the Veil Nebula
- Processing images of the Veil Nebula
About the Veil Nebula in the Cygnus Constellation
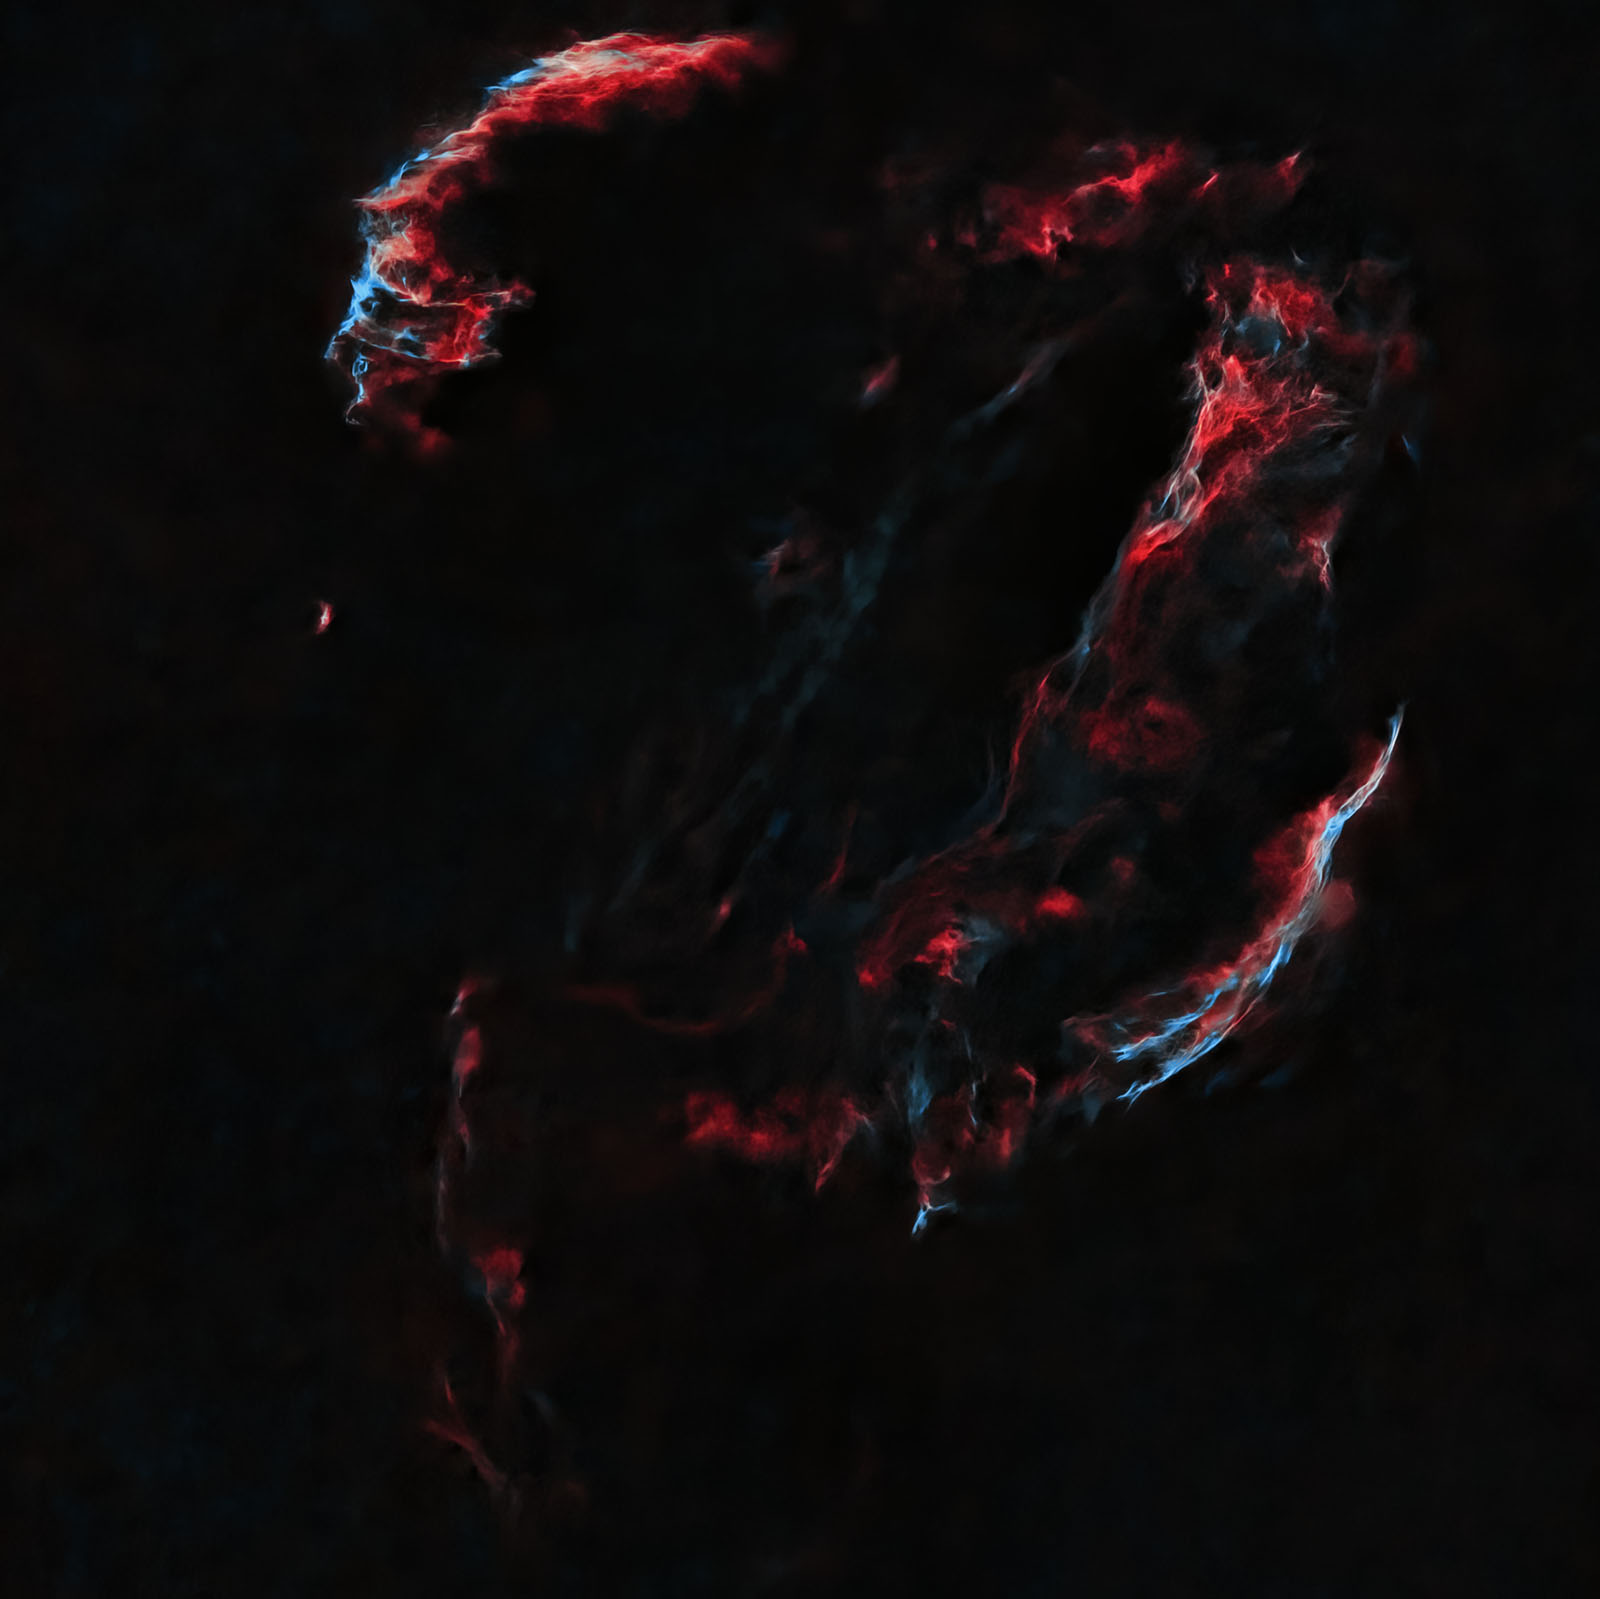
This is what the remnants of a supernova look like—the remains of an ancient explosion that occurred approximately 7,000 years ago. Its composition consists mainly of hydrogen, oxygen, and sulfur, making it an easy target to photograph using narrowband filters together with a mono astronomical camera, even from areas with significant light pollution. As shown below, it can also be photographed using a dual narrowband filter (Ha + OIII) together with a color (OSC) camera.
The red regions in the image come from ionized hydrogen emitting light at the H-alpha wavelength, while the blue-cyan color originates from ionized oxygen.
The Eastern Veil Nebula, together with its “sister” (the Western Veil Nebula), forms part of a much larger and extremely spectacular nebula. Together, they make up the visible portion of what is known as the “Cygnus Loop.” On July 14, 2022, I photographed the entire loop for the first time. The images are shown below.
Since the initial explosion, the Cygnus Loop has continued to expand, reaching an apparent diameter of about 3° in the sky today—equivalent to about six full moons placed side by side.
Theoretically, it is easier to photograph the entire loop than individual sections, because the full frame is captured at a shorter focal length, which reduces tracking errors.
It is possible to photograph it even with a standard (non-modified) DSLR, but the use of filters is recommended (such as an Optolong L-eXtreme, Ha + OIII filters, or an Optolong L-Enhance). Of course, a modified DSLR is preferable.
Image Gallery – Western Veil Nebula (NGC 6960)
Images captured on July 10 and 12, 2024, totaling 9h 18min, using an SW EQ6-R mount, SW Esprit 100ED telescope, ASI 533 MC camera, ASIAIR+, in Orlești (Vâlcea, Bortle 4–5)
Image Gallery – Eastern Veil Nebula (NGC 6992)
Update July 19, 2022: on July 14, 2022, with the “Supermoon” in the sky, I managed to photograph the entire Veil Nebula (Cygnus Loop) from the Bran area (Bortle 4 sky). The images show both the Eastern Veil Nebula (NGC 6992) and the Western Veil Nebula (NGC 6960). Pickering’s Triangle is also clearly visible.

Image Gallery – Entire Veil Nebula (loop structure – Cygnus Loop)
Update: July 27, 2023 – I photographed Pickering’s Triangle, one of the most spectacular regions of the Cygnus Loop, from the Orlești area (Bortle 4 sky). I used an EQ6-R mount, ASI 533 MC-PRO color camera (gain 101, -5°C), Optolong L-eXtreme filter, Sigma 150-600 lens @600mm and f/8.0, ASIAIR+, and 2 astro batteries. In total, I captured 107 frames of 3 minutes each. Total integration time: 5 hours and 21 minutes.
Image Gallery – Pickering’s Triangle
How to find the Veil Nebula – NGC 6992 in the sky
After easily identifying the Cygnus constellation in the summer night sky (the one shaped like a cross), the Veil Nebula is located very close to the middle of the imaginary line connecting the two lower stars of the constellation, as shown in the image below. These two stars (Gienah and Cyg) can be used as reference points.

Useful tips for photographing the Veil Nebula
The best period for photographing the Veil Nebula is from summer through September.
I photographed the Eastern Veil Nebula from a rural area with a Bortle 4 sky, from the garden, on June 20, 2022. It was supposed to be a perfect night, but things did not go that way: first, it was extremely difficult to position the Sigma lens at 500mm exactly on the nebula. Although I used the ASIAIR plate-solving algorithms and therefore knew both the sky coordinates toward which the lens was pointing and the coordinates of the target, it was extremely difficult to manually adjust (because I was using a SkyGuider Pro, where everything is done manually) both the right ascension (RA) and declination (DEC). On the SkyGuider Pro, fine RA adjustment is somewhat acceptable, but fine declination adjustment is difficult, despite the improvements I had made to the mounting head. It took me at least 30–45 minutes to adjust the declination properly. It was either too high, then after rotating in the opposite direction it became too low. Then I adjusted it again, and it was too high again, and so on. Just before giving up, I decided to try one more time to center the target correctly… and I succeeded.
Focusing and centering the target took one hour...
Then I took a 2-minute test frame and it looked terrible: the stars were extremely elongated, as if the star tracker was not working, even though it was turned on. Somehow, a few minutes later, the problem resolved itself.
At the end of the imaging session, around 3 a.m., when I returned to the camera, I found one battery completely drained—the one powering the camera cooling and the dew heater band on the Sigma lens. As a result, the last frames were not taken at -10°C, but at +18°C...
If I also mention the intermittent clouds that appeared around 1 a.m. and again around 2 a.m., plus the visit of a nocturnal wild animal on the other side of the fence, I can say that the night was very different from what I had hoped for... but in the end, I still collected a little over 3 hours of frames.
In astrophotography, behind a single image (often a mediocre one) there is an enormous amount of work and knowledge from photography, image processing, and astronomy. Some astrophotographers capture the same target over many consecutive nights and then stack all the frames, totaling tens of hours of imaging, obtaining exceptional results.
I used a ZWO ASI 533 MC-PRO color astro camera with a Sigma 150-600 lens at 500mm focal length and f/8.0 aperture. The camera was cooled to -10°C, while the outside temperature was around 18°C.
To reduce light pollution, I used an Optolong L-eXtreme 1.5" filter. This is a narrowband filter useful for creating a bicolor image, allowing the Ha and OIII wavelengths to pass through.
As usual, ASIAIR+ acted as the brain of the entire setup, handling most operations: focus checking, identifying the sky position toward which the telephoto lens was pointed using plate-solving, camera settings (number of frames, exposure time, gain), and guiding.
SkyGuider Pro with iPolar was used for polar alignment via laptop.
I also used an ASI 120 MM guide camera, a Manfrotto CX PRO3 tripod, and two dedicated batteries: Omegon Pro Powerbank 96k LiFePO4 307Wh 12V (which inexplicably ran out at the end) + Celestron Powertank Lithium Pro LiFePO4 159Wh.
Processing images of the Eastern Veil Nebula (NGC 6992)


Single frame (.fit debayered) vs. final processed image
The first step is loading the frames (Light, Flat, Bias, etc.) into PixInsight using Script >> Batch Processing >> WeightedBatchPreprocessing in order to stack the frames, after which the software exports a single final image that we will work on. I prefer this simpler method, with fewer settings, although there are many more advanced stacking options (including in PixInsight). There are also several other software tools: DeepSkyStacker (most commonly used on Windows), SIRIL (Windows, Linux, and Mac), or Starry Sky Stacker (Mac).
Below you can see several frames:
- an unprocessed frame (.FIT) captured with ASI 533 MC-PRO
- the master frame resulting from stacking all frames in PixInsight
- the master frame processed with BackgroundNeutralization. SCNR should then be applied to remove the green cast, followed by ColorCalibration. Next, noise is reduced, stars are extracted (STARNET++), and processing continues on the starless image. At the end, the stars-only frame is blended over the modified starless frame using PIXELMATH with the formula "combine (Starless, Stars, op_screen())".
- the starless frame before being exported from PixInsight to Photoshop
- the starless frame processed in Photoshop
- the stars-only frame