
- name: Cygnus Constellation (Cygnus, Northern Cross)
- Location/centering:
RA: 20hr 16' 30"; DEC: 35º 50' 30" (the coordinates correspond to a relatively central point toward which the lens was aimed)
About the Cygnus Constellation
The Cygnus constellation is easy to recognize in the summer night sky thanks to an asterism (called the Northern Cross) formed by its brightest stars (Deneb, Sadr, Albireo, Fawaris, and Aljanah). An asterism is a pattern or shape that people identify in the sky by connecting certain bright stars with imaginary lines. In this case, the recognized pattern has the shape of a cross, which explains the importance of this constellation in the collective imagination of Christian cultures and beyond.
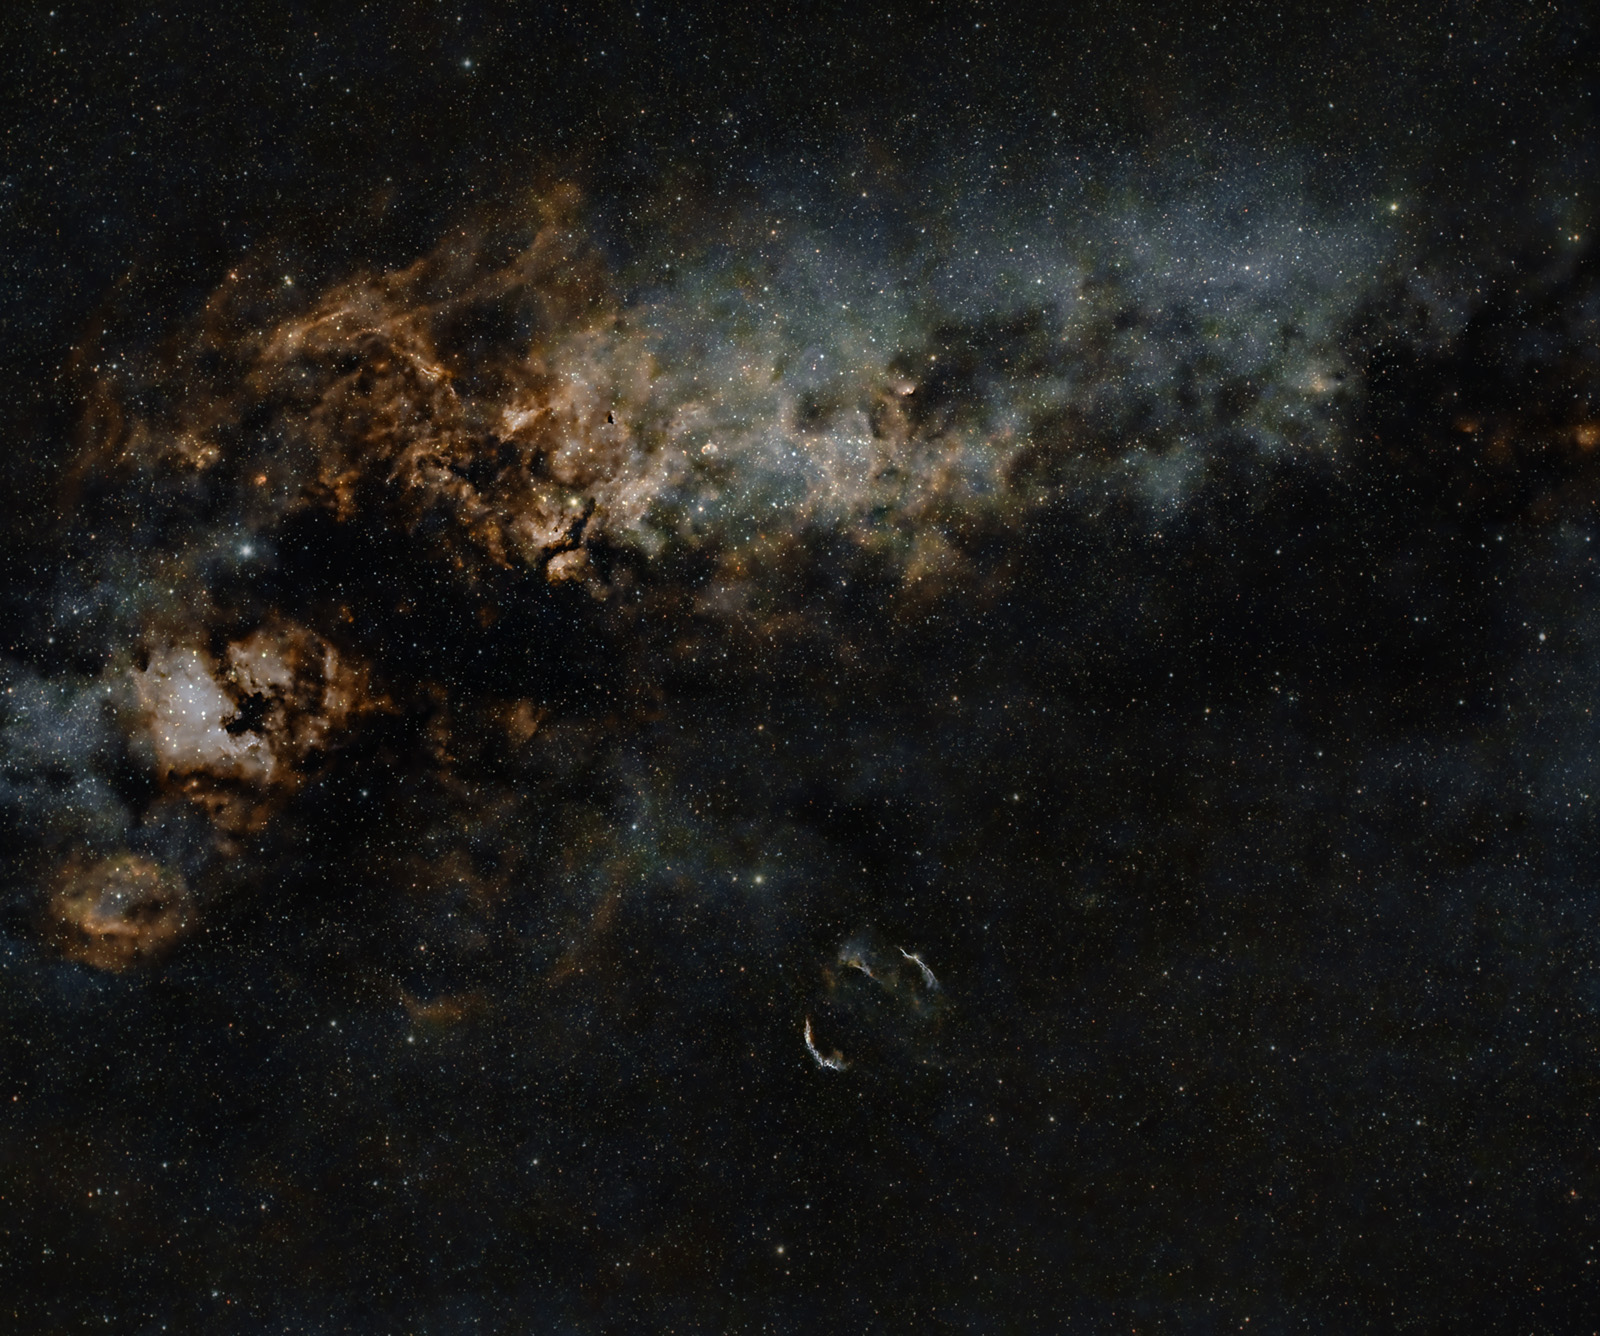
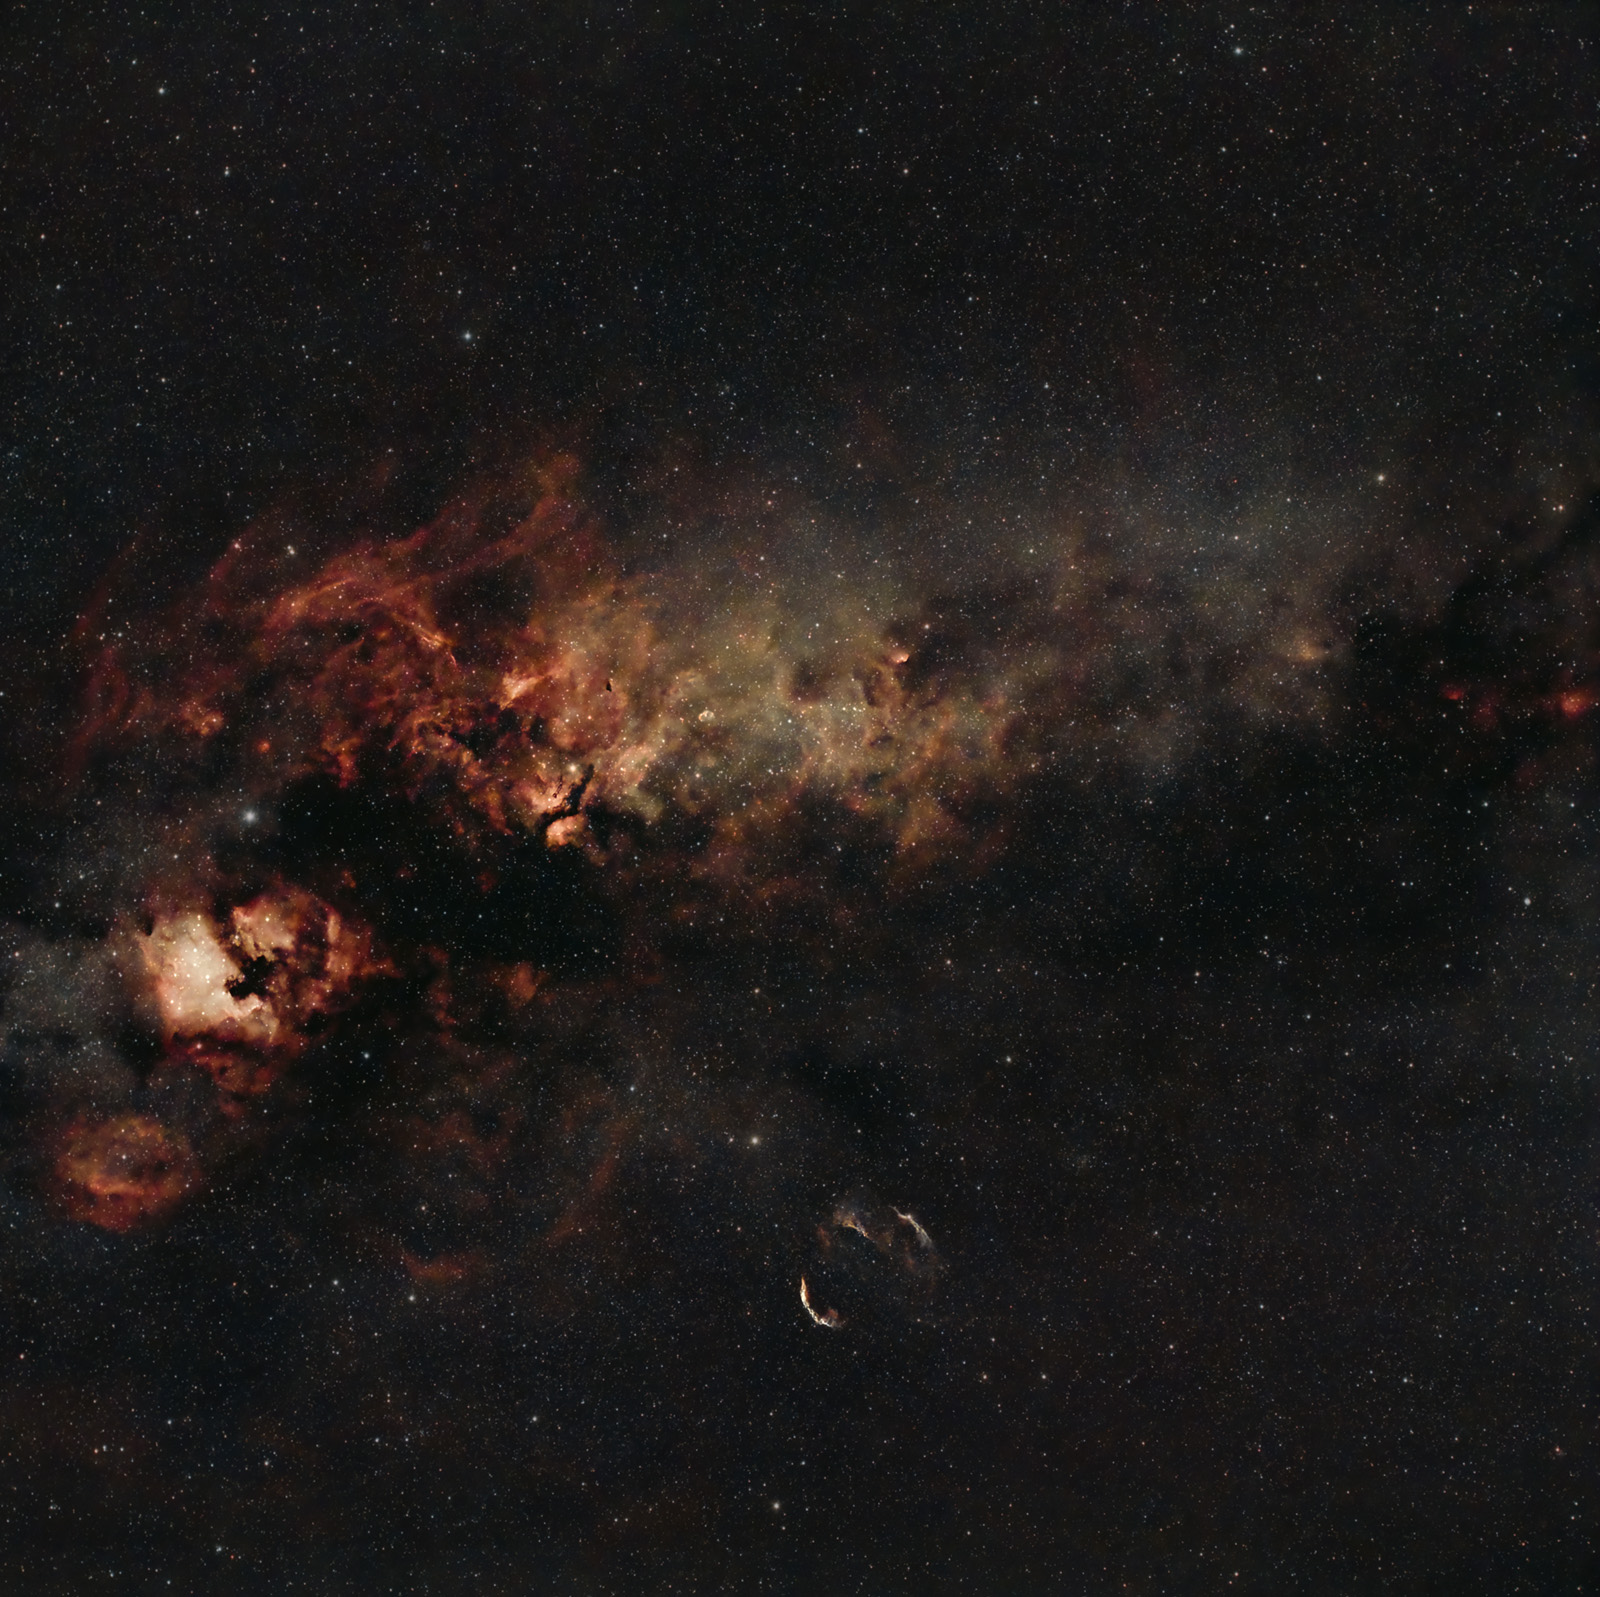
The brightest star in the constellation is Deneb, which together with Vega in Lyra and Altair in Aquila forms the Summer Triangle. At the center of the Cross lies the star Sadr, surrounded by a region of rich nebulosity, very interesting from an astrophotography perspective, known as IC 1318 or The Gamma Cygni Nebula.
In Romanian folk tradition, this constellation is called "The Cross", "The Great Cross", or "The Midnight Cross".
As mentioned by Ion Otescu in The Romanian Peasant’s Beliefs About the Sky and Stars,
"In the imagination of the people, this is the Cross on which Christ was crucified. That is why, when peasants see it at night, they make the sign of the cross, saying that Christ has appeared to them."
Of course, today, such ancient customs—through which people were symbolically connected to the sky—are no longer present among inhabitants of Romanian villages.
In other cultures, the shape of this constellation has also led to its name, the Northern Cross.
From both a visual and astrophotography perspective, this constellation is extremely spectacular. It contains many interesting targets, both for beginners and advanced astrophotographers. Some of these have already been photographed, and for several I have also written short articles in the form of astrophotography projects, where numerous details are presented. You can see them below.
-
Spectacular targets for amateur astrophotographers in the Cygnus constellation:
- North America Nebula (NGC 7000)
- Pelican Nebula (IC 5070)
- Veil Nebula ...one of my favorites
- Crescent Nebula (NGC 6888)
- Tulip Nebula (Sh2-101)
- Clamshell Nebula (Sh2-119)
- The region around the star Sadr (IC 1318)
- Two open star clusters from the Messier catalog: M29 and M39
- WR 134, a challenging target that I first attempted in July 2024 and turned out quite well
- Cocoon Nebula (IC 5146) – located closer to the Lacerta constellation than to the Cygnus asterism +
- Dumbbell Nebula (M27) – included here even though it does not officially belong to Cygnus, because visually it lies in approximately the same region of the sky

Gallery – 5 images of the Cygnus Constellation (Cygnus, Northern Cross)
Widefield frames from the Cygnus constellation: Crescent Nebula, WR 134, Tulip Nebula
Useful tips for photographing the Cygnus Constellation
There are two main ways to photograph the entire constellation: either you shoot it in sections and then stitch them together like a panorama (a method for advanced users that produces a very high-resolution image with many megapixels), or you capture it using a widefield lens, which is what I did.
I photographed the Cygnus constellation only once, on August 19, 2022, on a warm night, from my backyard in a village in the Oltenia region (Vâlcea–Drăgășani area), under a Bortle 4 sky. The night was quite clear and the guiding was good enough to allow 5-minute exposures… until clouds appeared and ruined about 25% of the frames.
The optimal imaging period is summer.
I used a ZWO ASI 533 MC-PRO color astro camera, with a Canon EF-S 10-22 lens at 22 mm focal length and f/7.1 aperture. The camera was cooled to -5°C, while the outside temperature was around 24°C.
To combat light pollution and highlight nebulae, I used a dual narrowband filter (Ha+OIII), the Optolong L-eXtreme 1.5".
A very important component was the ASIAIR+, which acts as the brain of the entire setup, handling most operations:
- focus checking
- identifying the sky position the lens is pointing at
- camera control (number of frames, exposure time, gain)
- guiding. Note that the SkyGuider Pro can perform only partial guiding, meaning it corrects movement only on the RA axis, not on DEC.
I also used an ASI 120 MM guide camera, a Manfrotto CX PRO3 tripod, and two dedicated batteries (Omegon Pro Powerbank 96k LiFePO4 307Wh 12V + Celestron Powertank Lithium Pro LiFePO4 159Wh).
Using the ASIAIR plate-solving algorithms, I was able to point the lens toward a relatively central area of the constellation (RA: 20hr 16' 30"; DEC: 35º 50' 30"), which I had previously calculated using telescopius.com and the SkySafari app.
In the end, out of the 50 frames captured, many were discarded due to clouds, and I was left with 31 light frames of 5 minutes each, 5 dark frames, and 100 bias frames. Total integration time: 2 hours and 35 minutes. Although the integration time was relatively short, I found the result quite satisfying.
Photographing this constellation can be a great project for beginners who have a simple star tracker (like mine), a DSLR modified for astrophotography (or even an unmodified DSLR), and a narrowband filter similar to the one I used. The filter is essential, along with the mount (star tracker). The advantage is that tracking precision does not need to be very high, since this is an extremely widefield composition (using an ultra-wide lens).
Processing images of the Cygnus Constellation


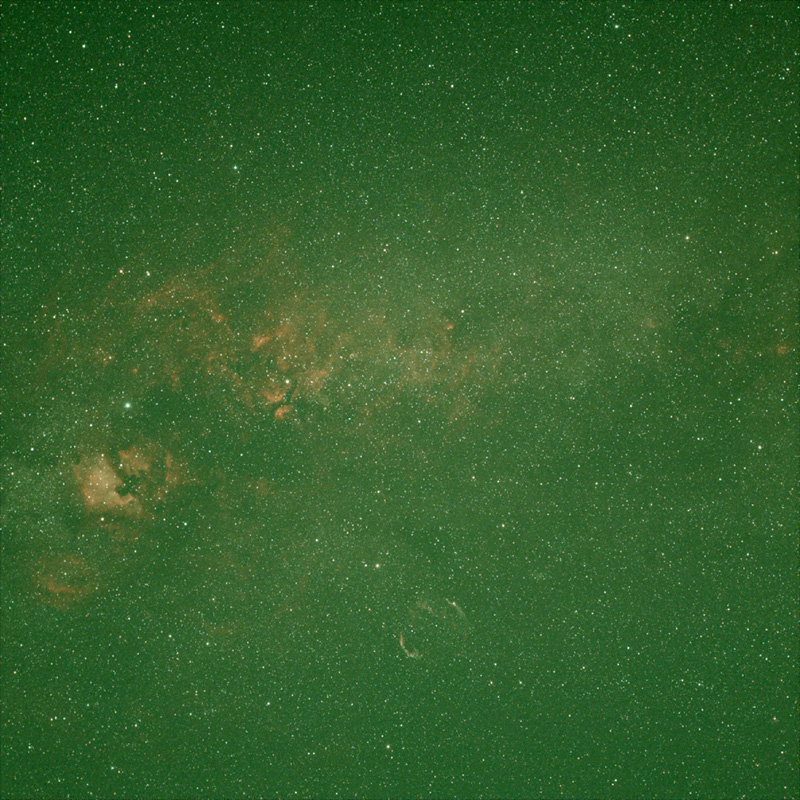
Single 5-minute frame (.fit debayered, BN, ABE, ColorCalibration, SCNR) vs. final processed image
The first step is loading the frames (Light, Flat, Bias, etc.) into PixInsight using Script >> Batch Processing >> WeightedBatchPreprocessing in order to stack the frames, after which the software exports a single final image that we will work on. I prefer this simpler method, with fewer settings, although there are many more advanced stacking options (including in PixInsight). There are also several other software tools: DeepSkyStacker (most commonly used on Windows), SIRIL (Windows, Linux, and Mac), or Starry Sky Stacker (Mac).
Below you can see several frames:
- an unprocessed frame (.FIT) captured with ASI 533 MC-PRO
- the master frame resulting from stacking all images in PixInsight
- the frame with stars removed using STARNET2
- the processed starless frame
Then, for the final images, I added the stars (reduced using MorphologicalTransformation) over the starless image using PIXELMATH.