
- name: The Leo Triplet of Galaxies (Leo Triplet – NGC 3628, M 65, M 66)
- location: Leo Constellation
- RA: 11hr 19' 40"; DEC: 13º 16' 06" (coordinates correspond to a central point between the three galaxies)
- distance from Earth: 35 million light-years
- magnitude: NGC 3628 (9.5), M65 (9.3), M66 (8.9)
- apparent size: NGC 3628: 13.1' x 3.1', M65: 9.8' x 2.9', M66: 9.1' x 4.1'
About the Leo Triplet (NGC 3628, M 65, M 66)
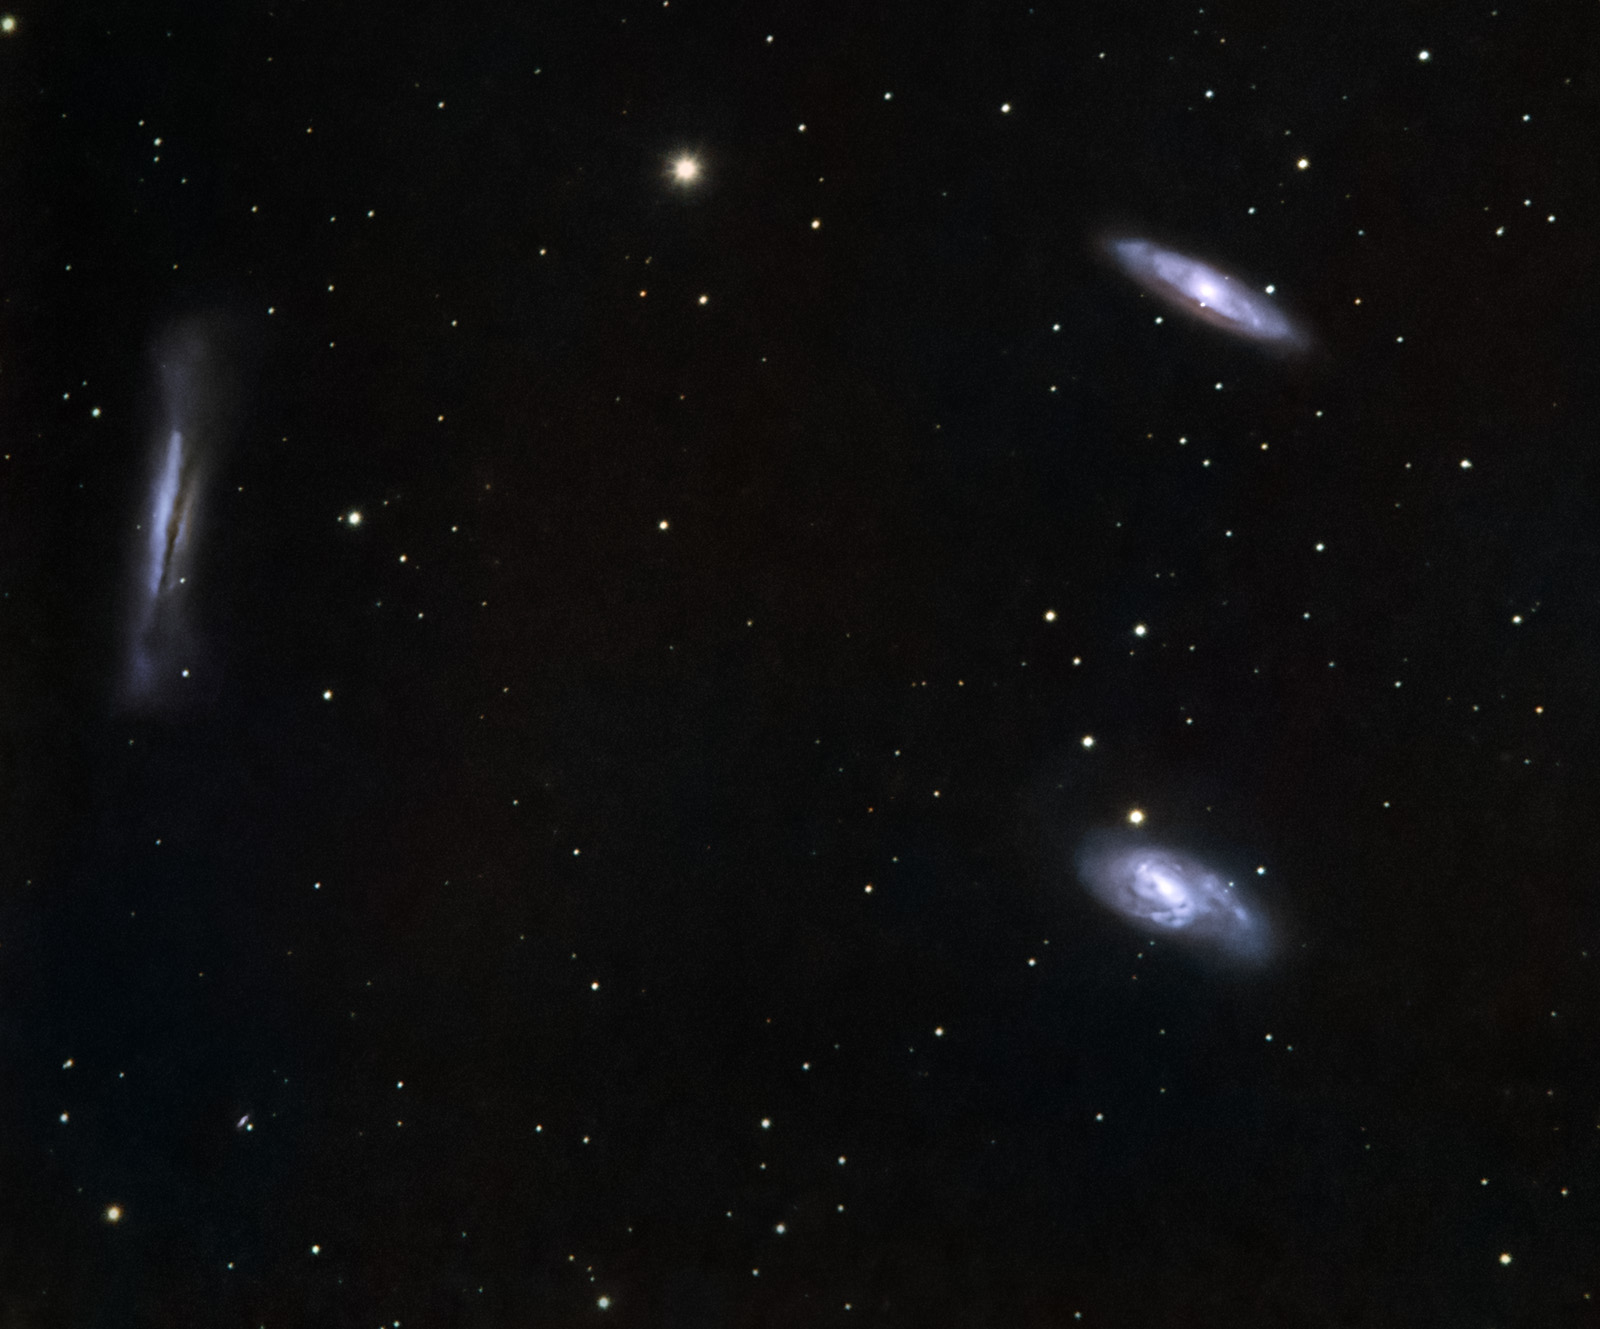
The Leo Triplet is a group of three spiral galaxies located in the constellation Leo, as shown in the image below: NGC 3628, M 65, and M 66.
NGC 3628 (the galaxy on the left) was discovered by William Herschel in 1784 and is also known as the Hamburger Galaxy due to its elongated, flattened shape with a dark lane across the middle.
M 65 (NGC 3623) was discovered by Charles Messier in 1780 and was included in his catalog.
M 66 (NGC 3627) was also discovered in 1780 by the same Charles Messier.
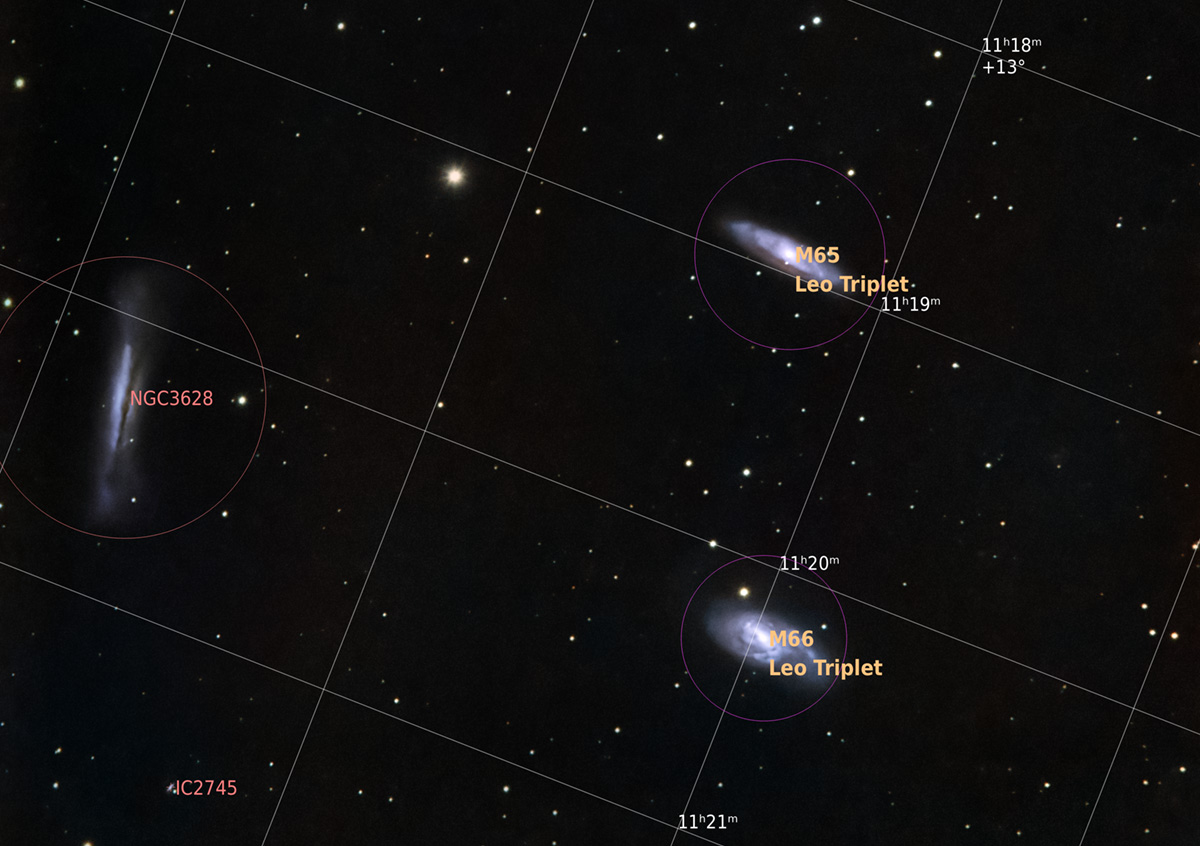
Image Gallery – The Leo Triplet (NGC 3628, M 65, M 66)
How to Locate the Leo Triplet (NGC 3628, M 65, M 66) in the Sky
The group of the three galaxies can be identified relatively easily in the night sky, being located below the tail of Leo, just beneath the star "Chertan".

Useful Tips for Photographing the Leo Triplet
I photographed the Leo Triplet only once, on March 25, 2022, on a cold night near Bucharest under a Bortle 6 sky. The night was quite clear, and the distinct and easily recognizable silhouette of Leo appeared fairly early toward the south, in the direction of the capital.
The optimal period for photographing it is spring, during the so-called “galaxy season.”
If we want to capture all three galaxies in a single frame, we need to aim the telescope/lens at a point located between them. Also, with a pixel size of 3.76 µm (as in the ASI 533 MC-PRO), a focal length of 500–600 mm is required.
More difficult is accurately pointing at a location between the three galaxies (for example RA: 11hr 19' 40"; DEC: 13º 16' 06") if we do not have a Go-To mount. I didn’t, and I used a SkyGuider Pro with iPolar. However, using the plate-solving algorithm provided by the ASIAIR+ app, I was able to identify the triplet relatively easily (in 10–20 minutes). Without plate solving and without a Go-To mount, it is very difficult to both find and properly center a target at a long focal length (over 500 mm).
I used a ZWO ASI 533 MC-PRO color astronomy camera, with a Sigma 150–600 lens at a focal length of 600 mm and an aperture of f/8.0. The camera was cooled to -20°C, while the outside temperature was around 0°C.
To reduce light pollution, I used a 1.5-inch Optolong L-Pro filter.
The ASIAIR+ mini-computer was essential, acting as the brain of the entire setup and handling most operations:
- focus checking
- identifying the point in the sky where the lens is aimed
- camera setup (number of frames, exposure time, gain)
- guiding. Speaking of guiding, the SkyGuider Pro can perform semi-guiding, meaning it can correct motion only on the RA axis, not on DEC.
The Leo Triplet can also be photographed with a standard DSLR (not astro-modified).
A color astro camera like the ASI 533 MC-PRO is more than sufficient for this broadband target, but it can also be photographed using a mono camera with LRGB filters.
Equipment used:
- Mount (star tracker): iOptron SkyGuider Pro with iPolar (polar alignment using a laptop)
- ZWO ASI 533 MC-PRO camera
- Sigma 150–600 f/5.6–6.3 Contemporary lens at 600 mm, f/8.0
- Optolong L-Pro 1.5" filter
- ASIAIR+
- ASI 120 MM guide camera
- Manfrotto CX PRO3 tripod
- 2 dedicated batteries: Omegon Pro Powerbank 96k LiFePO4 307Wh 12V + Celestron Powertank Lithium Pro LiFePO4 159Wh
Processing Images of the Leo Triplet (NGC 3628, M 65, M 66)
The first step is loading the frames (Light, Flat, Bias, etc.) into PixInsight using Script >> Batch Processing >> WeightedBatchPreprocessing to stack them, after which the software exports a single final image that we will process. I prefer this simpler method with minimal settings, although there are many more advanced stacking options (including within PixInsight). There are also several alternative software solutions: DeepSkyStacker (the most commonly used on Windows), SIRIL (Windows, Linux, and Mac), or Starry Sky Stacker (Mac).
Below are several stages:
- a raw (.FIT) frame captured with the ASI 533 MC-PRO
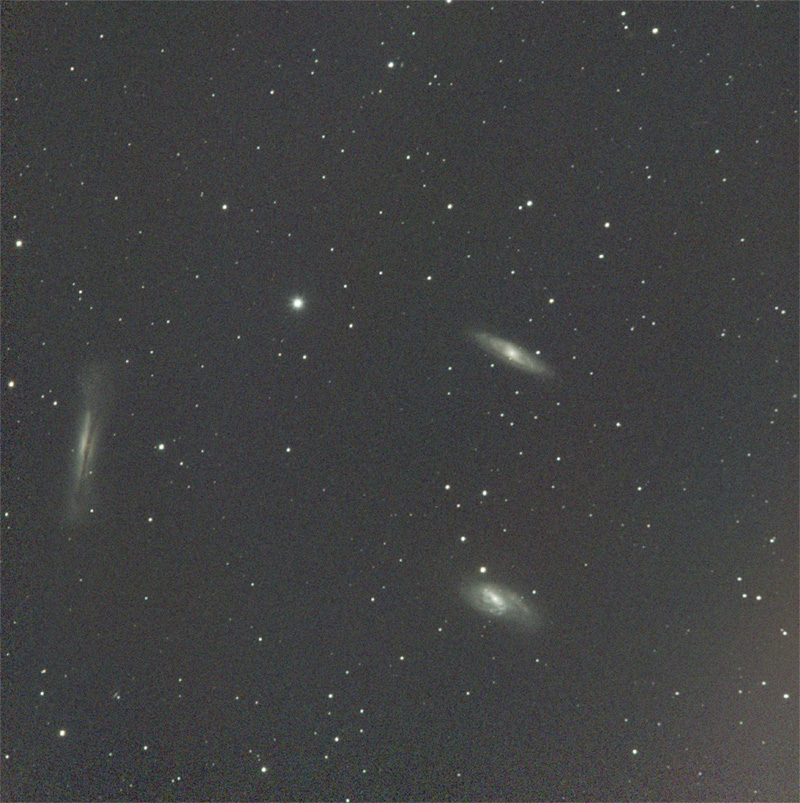
- the master frame obtained in PixInsight after stacking all frames
- the master frame processed with BackgroundNeutralization + AutomaticBackgroundExtractor. You can still see a gradient in the bottom-right corner caused by light pollution.
On this image, DynamicBackgroundExtraction should be applied to remove the gradient, followed by SCNR (to eliminate the green cast). Then noise reduction is applied, stars are extracted (STARNET++), and processing continues on the starless image. At the end, the stars-only image is recombined with the processed starless image using PIXELMATH.
- the final processed image (PixInsight + Photoshop)
- if further processing is done in Photoshop, tools like Topaz Denoise (for noise reduction) or Topaz Sharpen AI (for increasing sharpness) can be used.